The New Observer 90mm Refractor – Orion Destroyed Their 90mm Beginner Scope

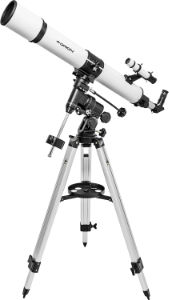
The new Orion Observer 90mm refractor is the replacement for the Orion Astroview 90mm refractor telescope that I have recommended for years as the almost-perfect beginner telescope for newcomers to the hobby. That has abruptly come to an end after I got my hands on their new telescope.

Orion Observer 90mm refractor

General review of the Observer 90mm

One week with the new Orion Observer 90mm and I had had enough and returned it. The reason? Plastic.

The Orion Observer 90mm is now a huge gob of plastic parts held together by a few pieces of metal. There is enough metal to do a pretty good job of holding those plastic bits together, but just barely.

Observer 90mm focuser

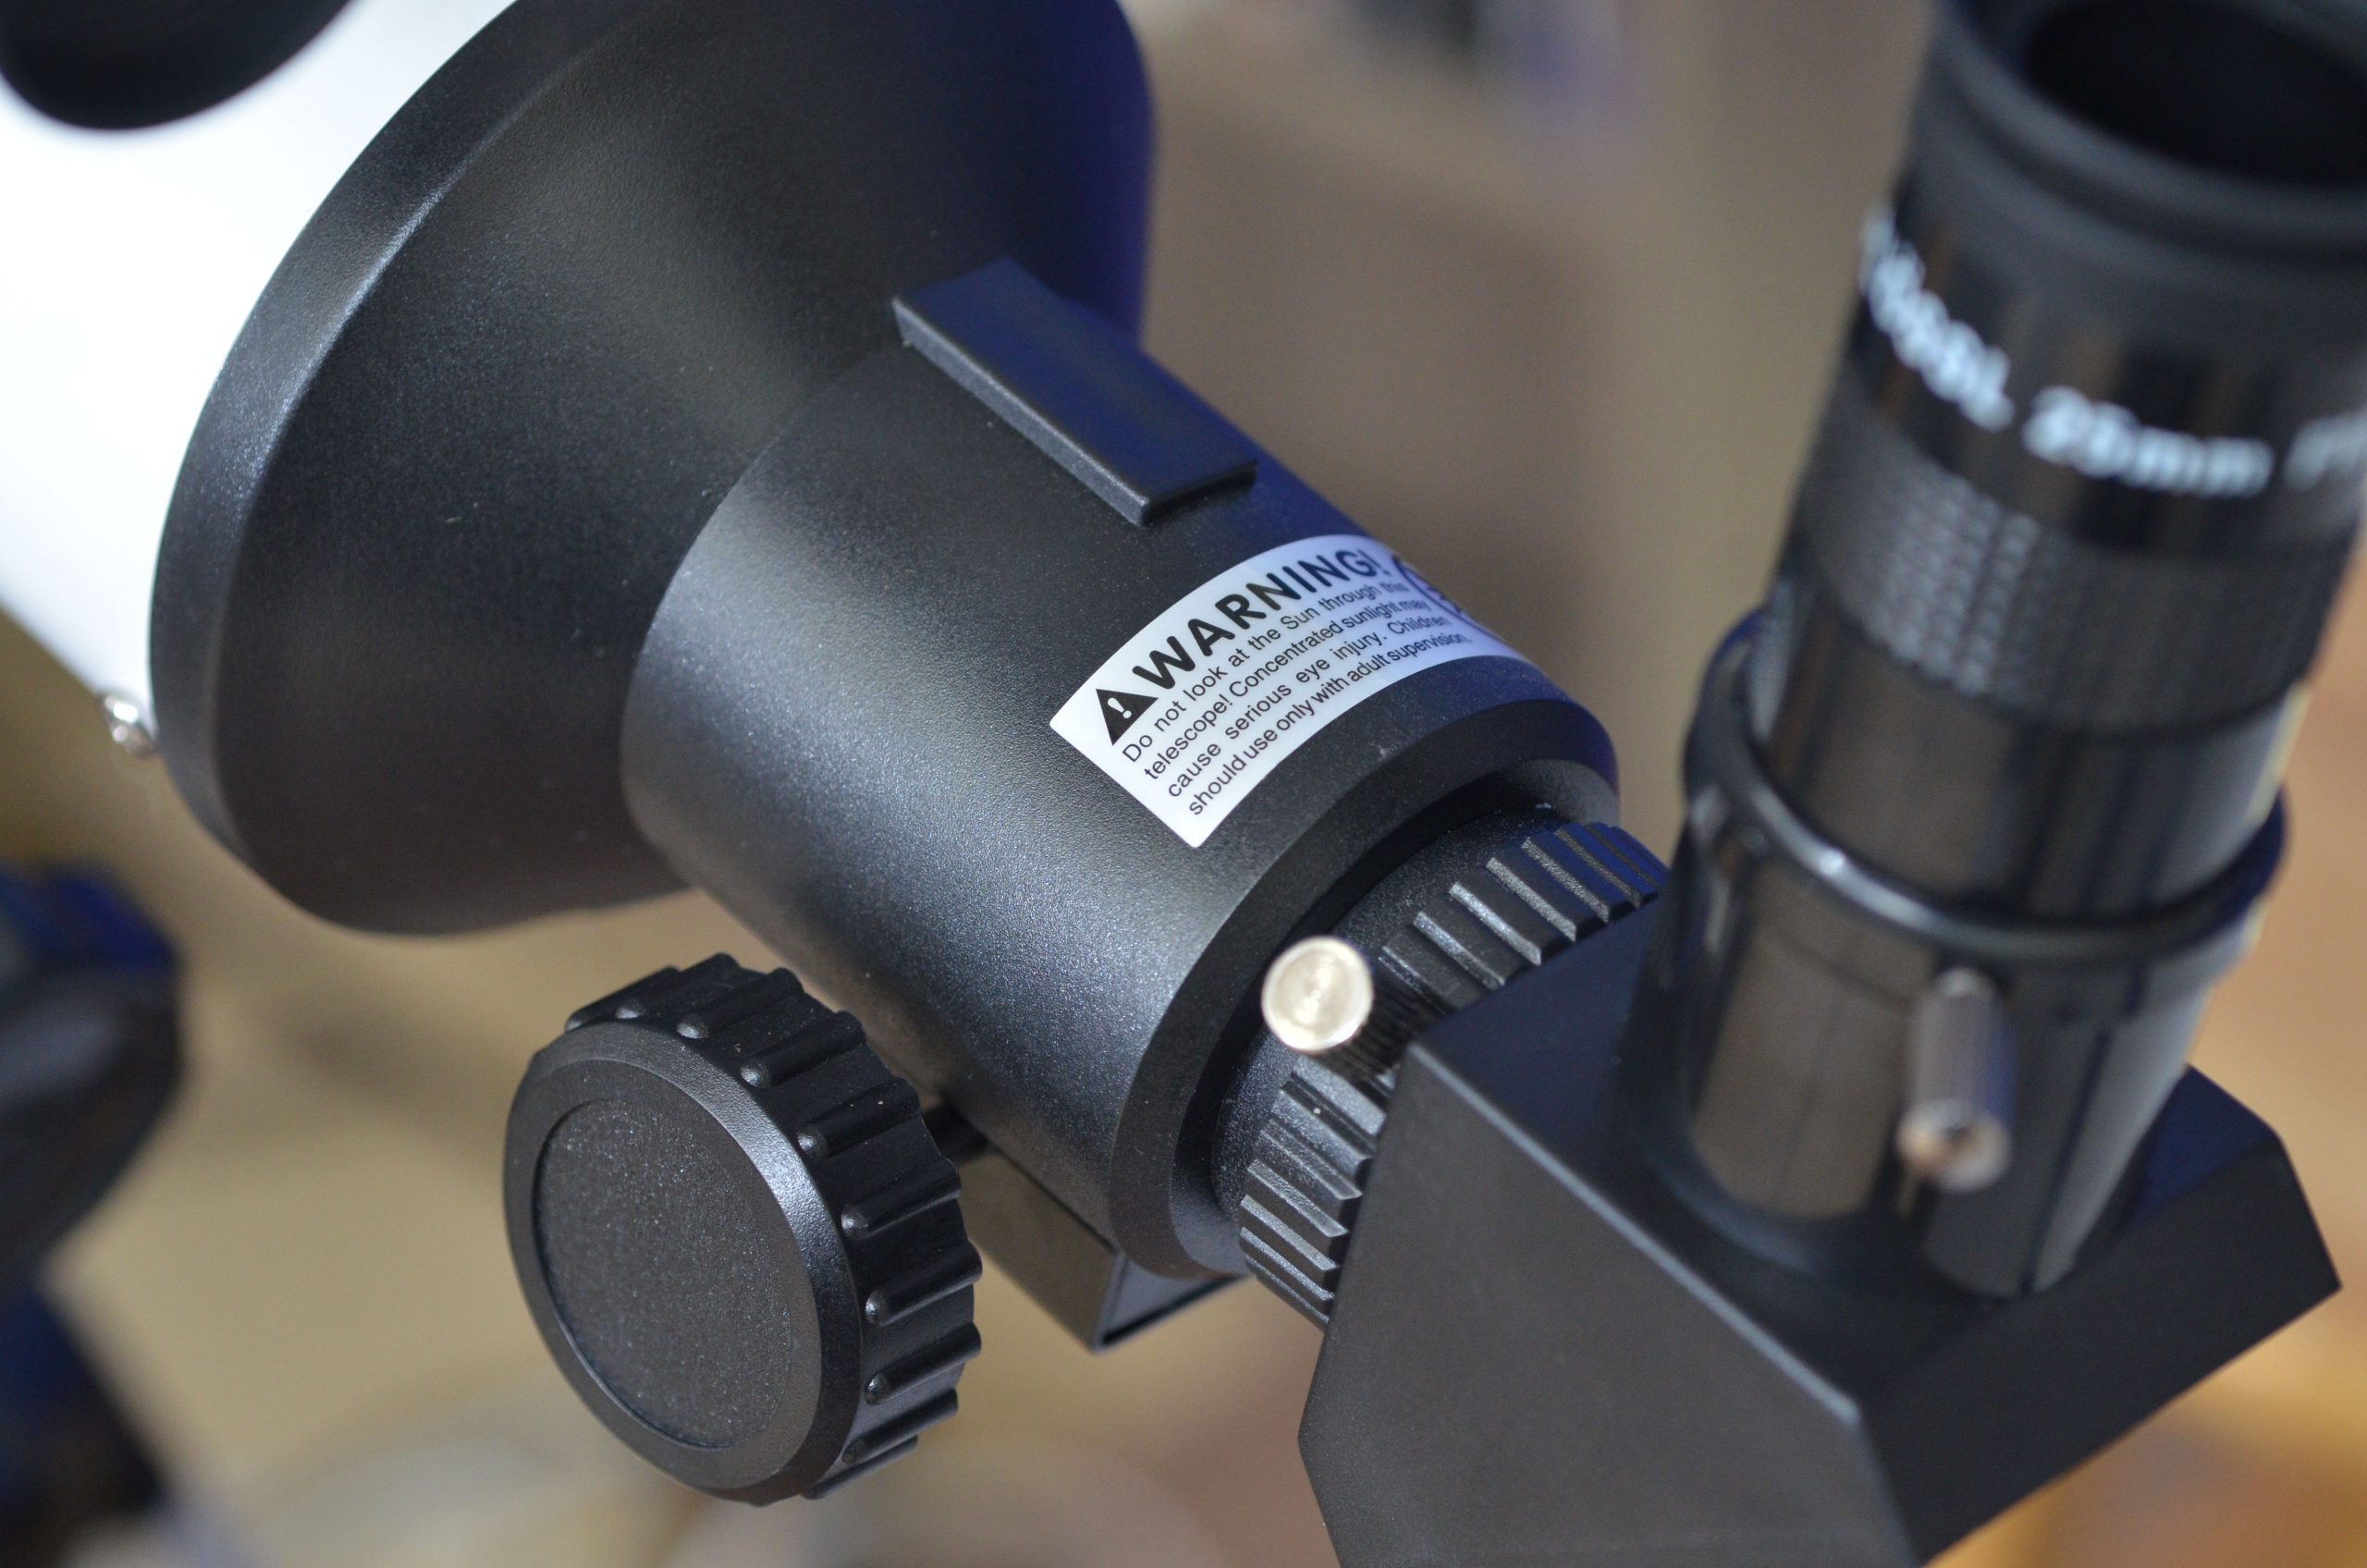
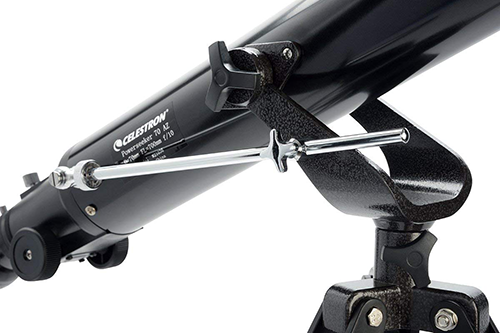
Let’s start with the part that just chapped my….well, hindquarters, the focuser. Now a lot of telescopes these days have a plastic, or mostly plastic, focuser. The problem is that as far as I can tell, it is virtually all plastic and that causes a few problems on the Observer 90mm.

The first of the Observer 90mm’s plastic focuser issues is that it is not smooth. The view is fairly smooth as you rack in and out, but the focuser itself is not. You can feel every gear, and it is annoying. Particularly since I do not have another telescope that rough. Not even the Gskyer telescopes I bought for my new GskyerTelescopes.Net website. Yep, the Observer 90mm focuser is worse than the one on the $50, 70mm Gskyer.

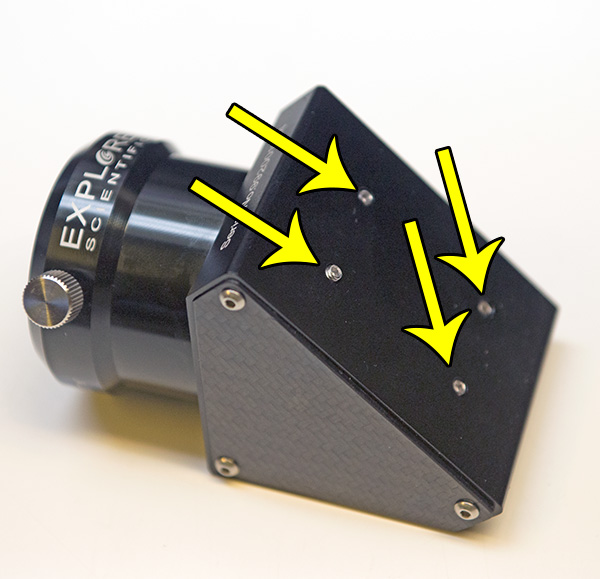
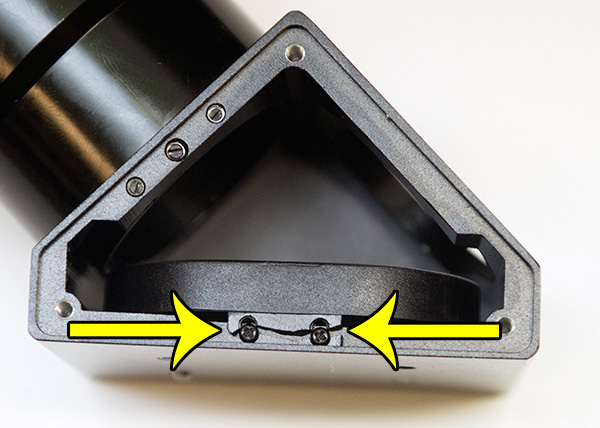
To add insult to injury, the two metal screws in the Observer 90mm‘s focuser tube that tighten the plastic diagonal, are run through the plastic threads in the plastic focuser tube. You know how well that is going to work, right? You guessed it, they will strip out and then you won’t be able to tighten your diagonal anymore.

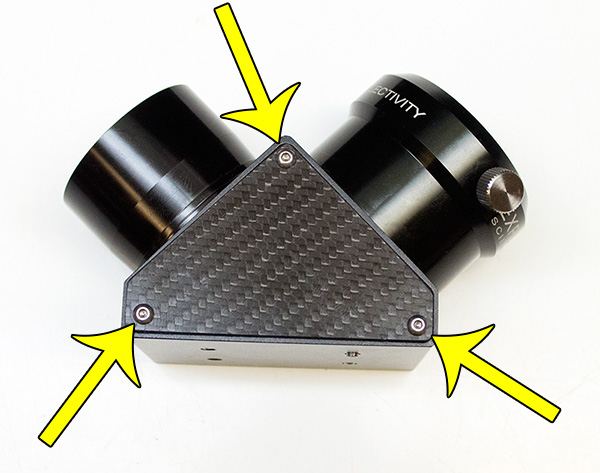
This leads me to the next issue with the Observer 90mm, the plastic diagonal with metal screws. OK, this is not that uncommon today and can easily be replaced with a nice metal diagonal for less than $20 but still, for a telescope at this price point, they couldn’t have included it?

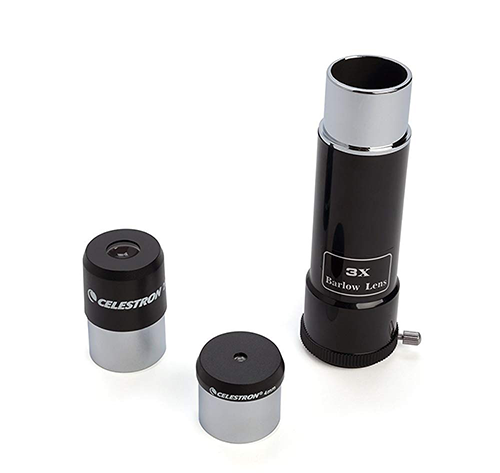
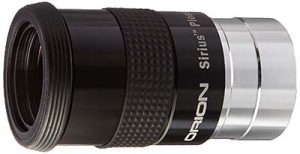
Orion includes two eyepieces with the Observer 90mm to put into your plastic diagonal, neither of which have their name on them. This is the first telescope I have received that had eyepieces but they were not Orion branded. How bad do things have to get before you won’t even put your name on a product?

The Vixen rail on the new Observer 90mm

On the bright side, the new Orion Observer 90mm telescope now attaches the telescope tube to the mount using a standard Vixen rail. This has been a pet peeve of mine for years as the previous model, the Atroview, and the model before that, the Skyview, both used a proprietary bolt-on attachment. Yes, you could get a conversion kit from a 3rd party, but what a pain. I always thought that if they used a rail they could use one mount for all their telescopes in that range and make them easy to swap.

What do I know?

Unfortunately, that is all the good news I have for you, at least I put it in the middle to break up this rampage against Orion’s new Observer 90mm.

The telescope tube of the Observer 90mm is held to the new Vixen rail by a, wait for it, plastic clamp. I fully expect this clamp to fail and leave you with a telescope you can not longer attach to your mount without a lot of glue or duct tape (just kidding on the duct tape, maybe).

Orion's new mount for the Observer 90mm

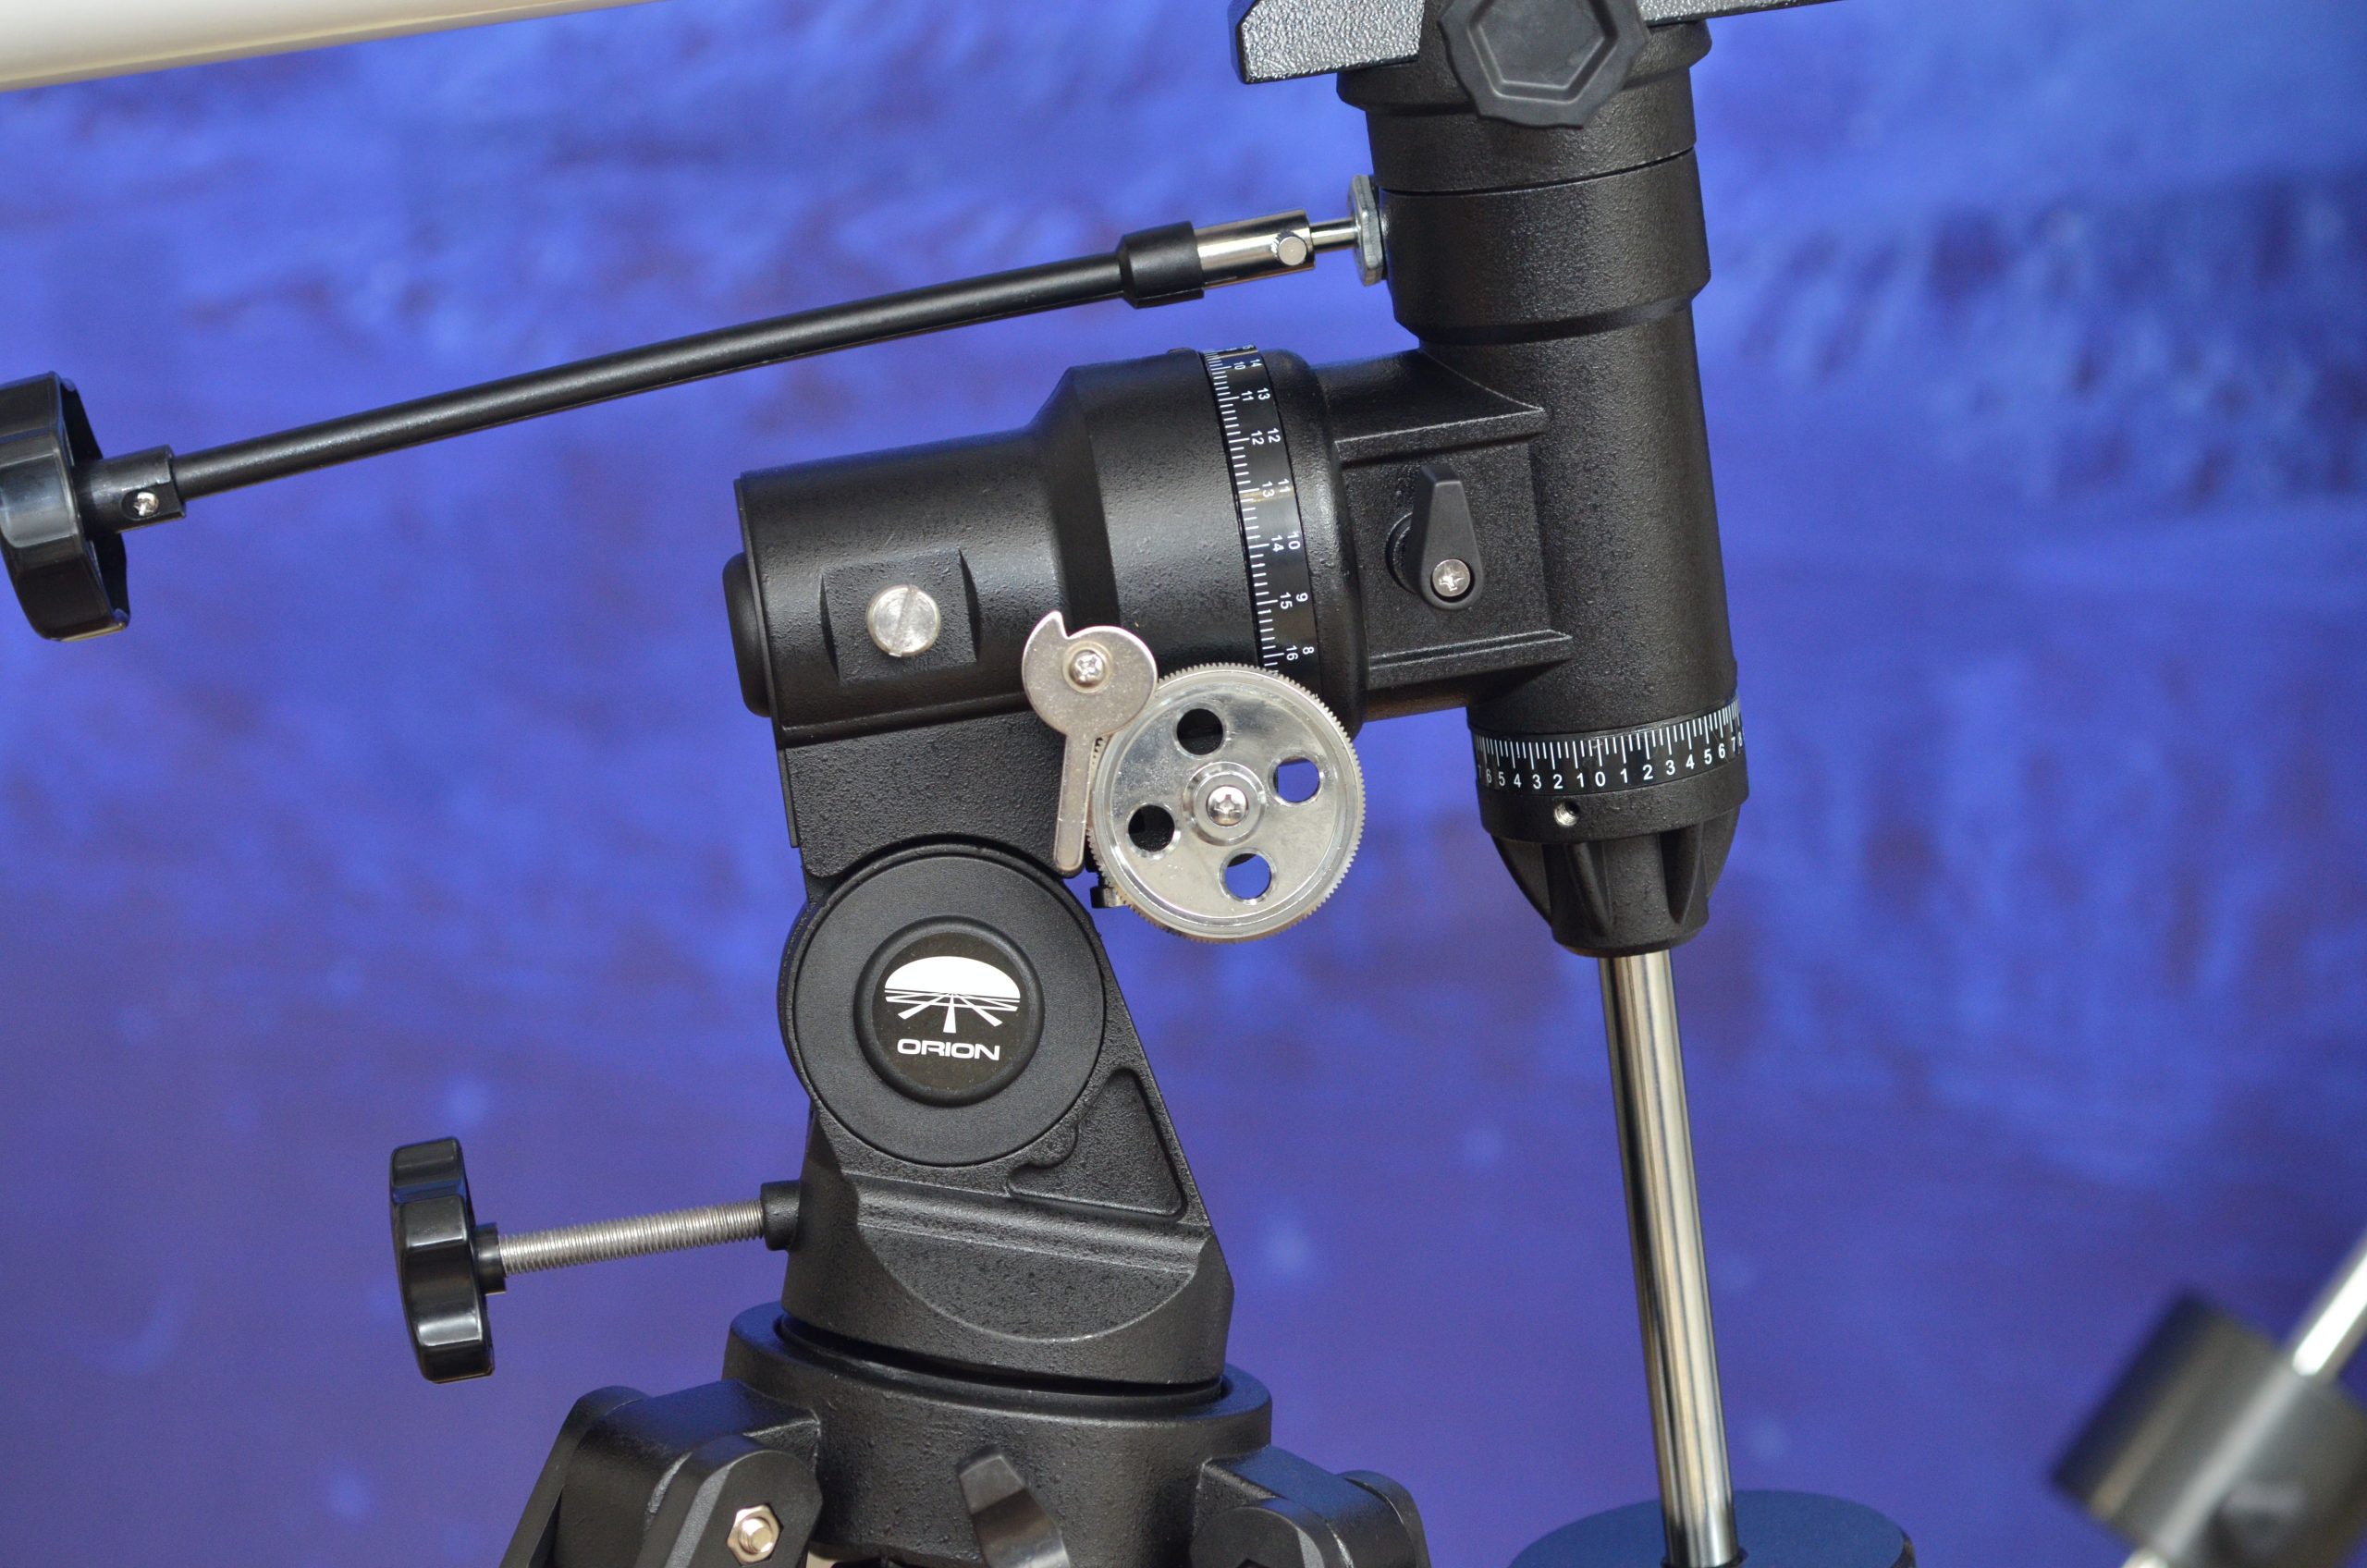
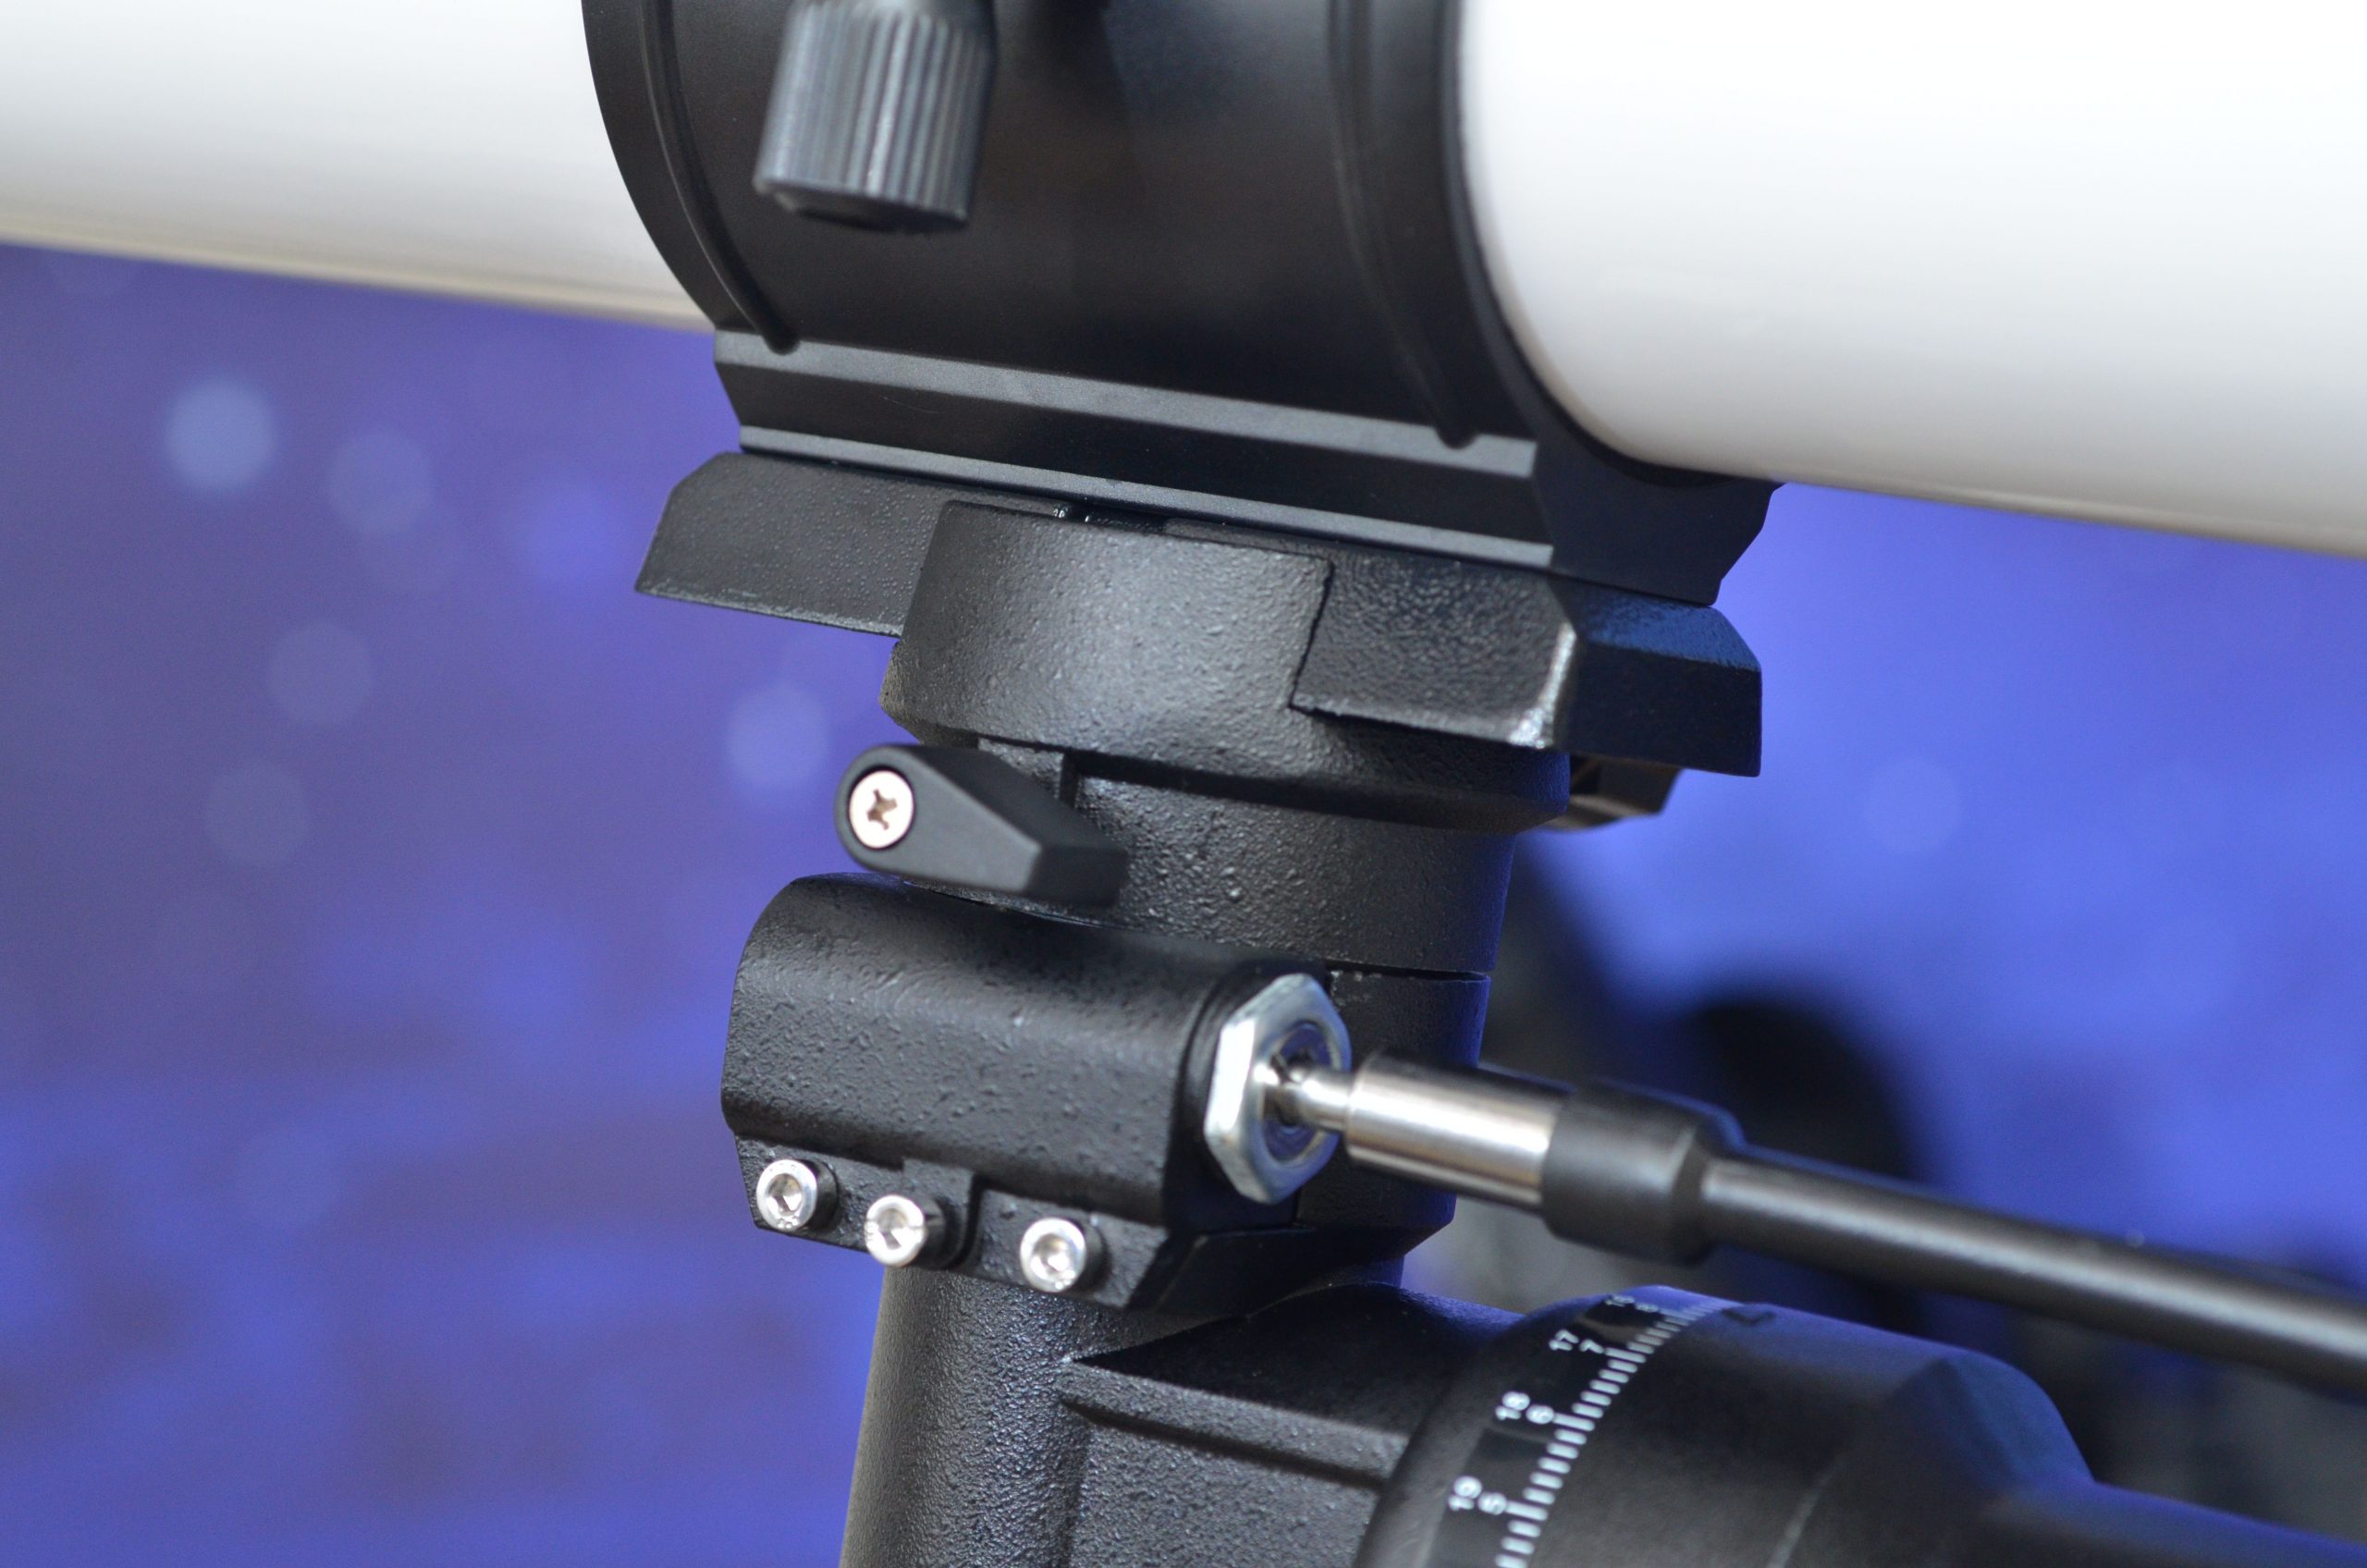
One thing I was really excited about was the new mount that they put the Observer 90mm on. While the Astroview’s mount was far better in the field than it looked, it paled to the old Skyview Deluxe mount before it. I was really hoping that they had returned to a nicer mount with the Observer. My hopes were dashed, again.

While the new mount for the Observer 90mm looks beefy, it is, in fact, lighter than the previous mount. It also is no more stable. I know, it looks like twice the mount, but it isn’t. I am not sure how they pulled that one off. To make it even worse, it is substantially stiffer and harder to move around when unlocked (or using the slow-motion controls). Even balancing the scope is more difficult because completely unlocked the scope will not swing, even when massively unbalanced. This means you have to balance the Observer 90mm by feel which is not a big deal for an experienced user, but for a beginner that can be a challenge.

Moving down to the Observer 90mm’s tripod legs you will immediately note that they are missing the rubber tips on the bottom. This means when the telescope is on something smooth, it tends to scoot and slide around. When I put it in my living room with hardwood floors I could literally slide it around the room with the push of one finger. Annoying at best.

This also affects stability when you are on any kind of smooth surface as the legs on the Observer 90mm will tend to spread and bow. This happens on wooden decks, polished concrete, and I would assume tiles such as around pools and hot tubs. The old Astroview and Skyview models did not have this problem.

I also think the tripod is a little flimsier than the Astroview model as well as being a little shorter. This makes the whole assembly less stable than it could be with a few minor upgrades from the factory (better legs, rubber tips, better locks, etc).

Orion Observer 90mm finderscope

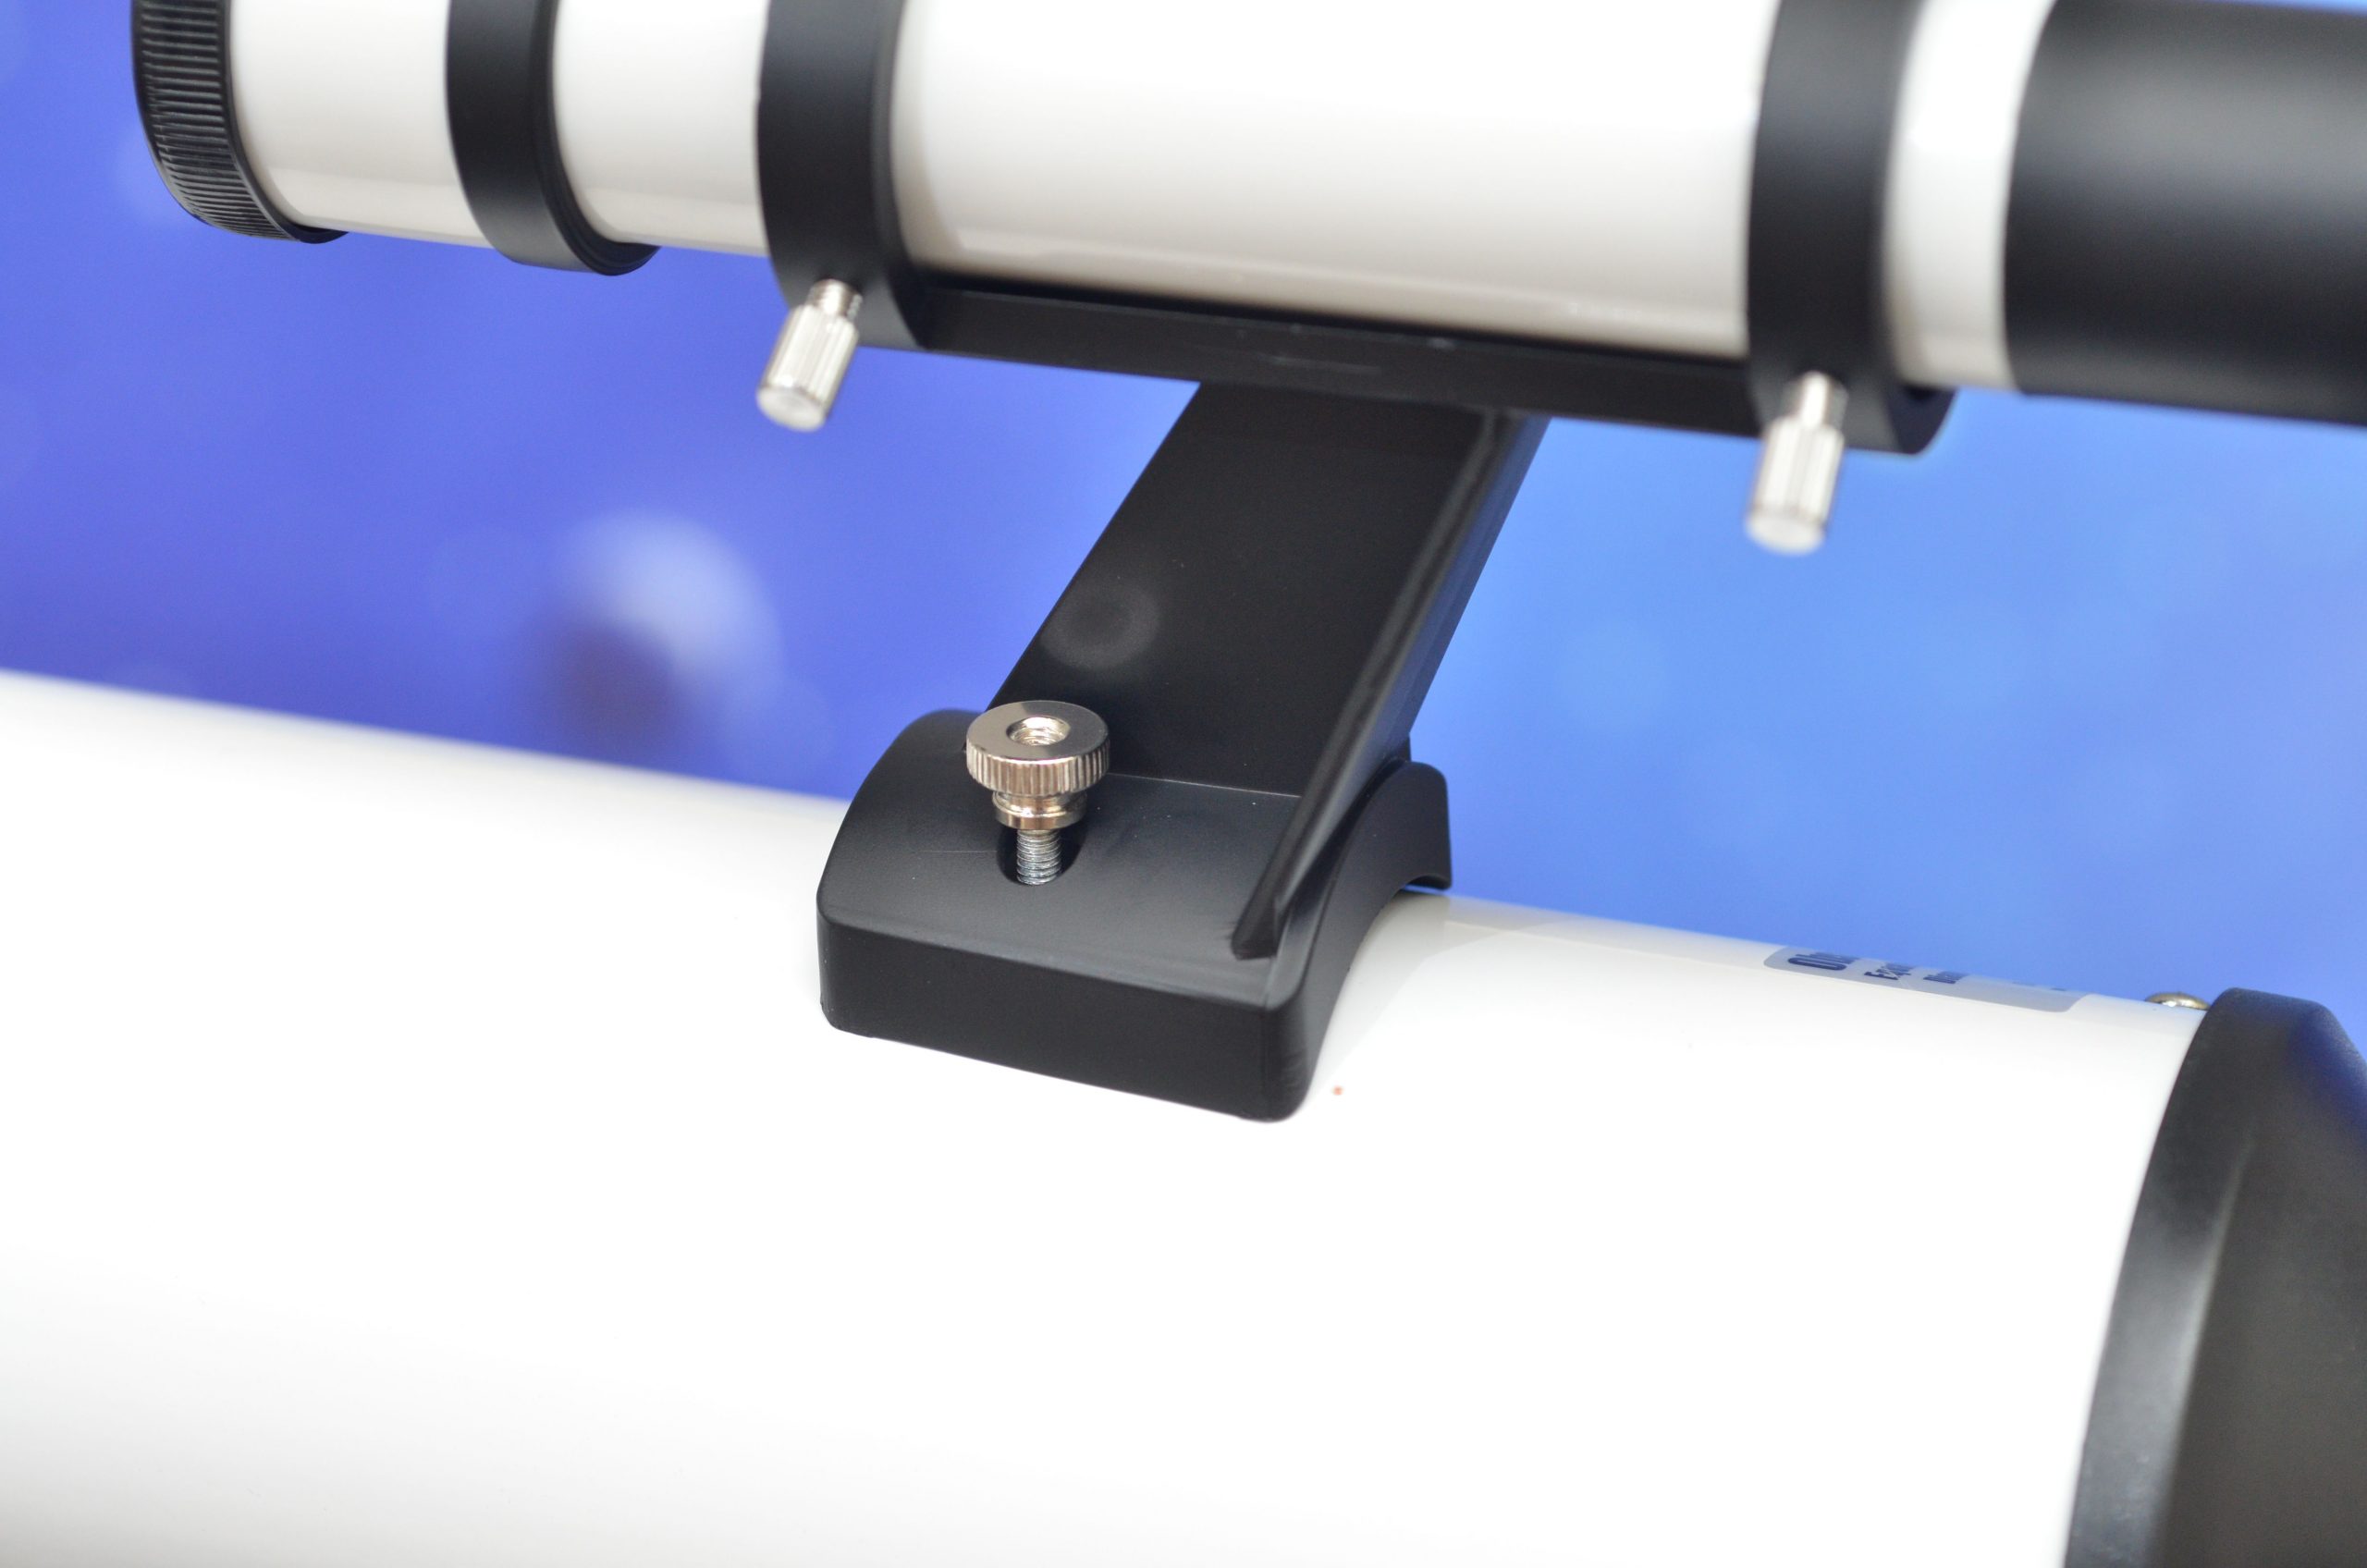
Another place they backed up with the Observer 90mm is the finder scope. In the last two iterations of Orion’s 90mm refractor, this was a standard dovetail mount, now it is a cheap, and plastic, two-bolt mount. Yes, it works, but it also seriously limits you to what you can attach here without an adapter.

It honestly seems that everywhere I look on the Observer 90mm, there is a downgrade of some sort, except the price. They managed to keep that the same.

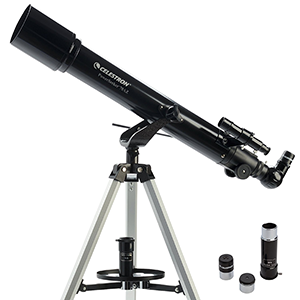
You might be thinking they had to lower the quality of the Observer 90mm to keep the price the same, and I might be tempted to agree with you, except when you look at their competition. I just had, literally an hour ago, a Celestron Astromaster 90mm EQ refractor delivered, brand new in the box. From everything I have read, I expect it to be my new recommended beginner telescope.

Stay tuned here and on my YouTube channel for reviews of the Celestron scope. Hopefully, it will be an improvement over the Orion Observer 90mm and it is currently $80 or so cheaper which makes it a no-brainer if it passes muster.

Viewing with the Orion Observer 90mm

All of the negative stuff out of the way, how does the Observer 90mm perform when viewing out in the field? The short answer is, not bad at all.

Optically it seems no better or worse than the ones before it. In all fairness, you would have to try pretty hard to mess up something this simple so I am not really bragging on the scope, just saying that where they did seem to goober the rest of the scope, they appear to have left the optics mostly alone.

I am not sure it has much in the way of coatings as reflections are clear with no color cast and that is rare in coated optics at this price range. It does not seem to change the views though. There seems to be no more or less of a magenta halo around bright stars or the moon.

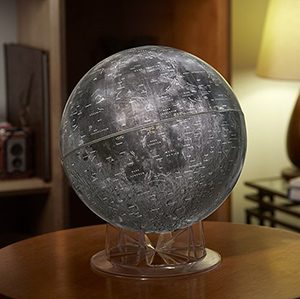
Speaking of the moon, one of my favorite targets with any 90mm refractor, the views are nice and crisp with good detail as long as your seeing conditions permit. It has been stupid-hot here in Texas lately so the one week I spent with the Observer 90mm had some terrible seeing conditions. The scope performed no worse than my Orion Astroview or Orion Skyview Deluxe though, so that is something.

I did really hate the stiffness of the Observer 90mm mount though. It and the focuser really detracted from otherwise nice viewing sessions.

Conclusions on the Orion Observer refractor

If you bought the Orion Observer 90mm, and you are within your 30 days, return it. There are better options.

My first recommendation for a replacement is to see if you can find an old stock or used Astroview 90mm refractor, or even better, a Skyview Deluxe 90mm refractor if it has been well cared for. All of these are currently (July 2022) available on eBay. I would even pay the same price for a good used Astromaster as what Orion is asking for a new Observer 90mm. It really is that much of a better telescope.

The Celestron Astromaster 90mm, a great alternative to the Observer 90mm

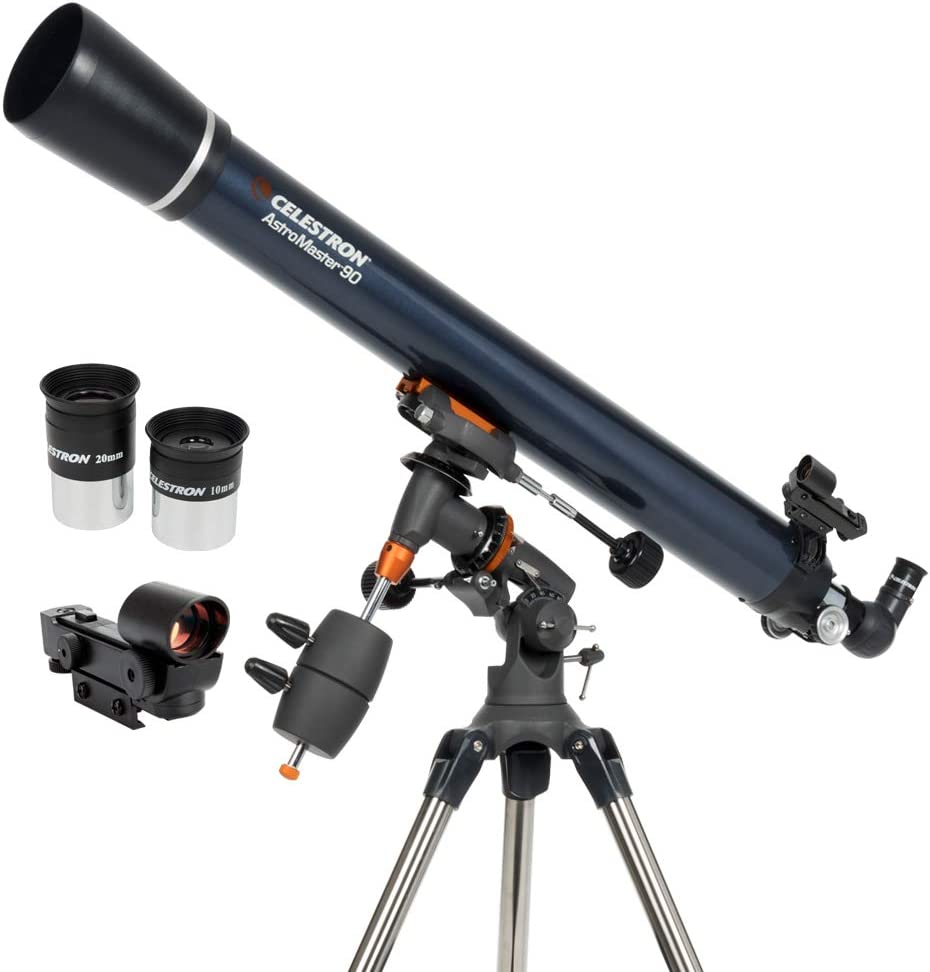
If all that fails, and from every indication so far, I would look at the Celestron Astromaster 90mm EQ as a good option for less money. I will have more information on that later, but just moving the unopened box from the front porch to my office tells me it is a seriously more substantial product than the Observer 90mm.


I hope you enjoyed this Orion Observer 90mm review!


Share this post! Facebooktwitterredditpinterestlinkedintumblrmail

New Gskyer Telescope Website to help beginners

Recently, a Gskyer telescope manual has become one of the most sought-after things in beginner astronomy. Quite a few people have asked me for help with their new scope. The actual Gskyer telescope website has no helpful information that I could find. The few websites that seem to turn up when people are looking for a Gskyer telescope manual are click-bait websites just trying to make money off of them without providing any kind of real help.

I always try to help when someone asks, particularly beginners because I know from personal experience how frustrating it can be to have a telescope and not be able to use it. This led me to a thought, what if I could provide some targeted help to these people? The Gskyer telescopes seem to be selling well on Amazon so there are probably a lot of people who need the information. How can I help them get it?

Launching my own informational Gskyer website, GskyerTelescopes.Net, was my answer.

Visit my new Gskyer telescope website at GskyerTelescopes.net

My goal is to make this new Gskyer telescope website a one-stop repository of pretty much anything the budding astronomer with a Gskyer telescope might need. From how to assemble your telescope, how it works, accessories that come with it, new accessories you can add, and detailed information on how to use your new friend are all included. I provide a variety of ways a visitor can find help including:

  • Text
  • Images
  • PDF files
  • Videos

So what is available on this new Gskyer telescope website?

Included are reviews, how-tos, and suggestions for all the current models of Gskyer telescopes available including the AZ60350, AZ70400, AZ80400, AZ90600, and 130EQ. This covers everything from their little “travel” desktop refractor all the way to their “professional” 130mm reflector on an EQ mount.

Unlike a lot of websites out there, I actually purchased or borrowed every telescope that Gskyer made and used it. This allows me to provide first-hand accounts of things to watch out for, how things work, and how they compare to not only each other but to other manufacturers’ offerings. You will get to watch me in the videos play with each and every single one, and all the accessories too.

All of this really made me realize just why so many people are scouring the internet looking for a Gskyer telescope website, or some form of information. There is virtually nothing included with the telescopes other than a one or two-page assembly guide. That simply is not enough for any telescope, let alone their 130EQ which is a 130mm Newtonian reflector on an equatorial mount.

I use a lot of video on my new Gskyer telescope website

I am currently just putting together my new Gskyer telescope website so don’t be too critical. If you have suggestions on information I can provide that will be helpful, or see something that doesn’t work, let me know. You can also pitch in and lend a hand, I am happy to take articles and more about Gskyer telescopes, just contact me using the “Contact Me” link at the top of either this website or GskyerTelescopes.net.

I hope you come visit my new Gskyer Telescope website!


Share this post! Facebooktwitterredditpinterestlinkedintumblrmail

Celestron Powerseeker 70AZ telescope review

The Celestron Powerseeker 70AZ is frequently a top recommendation when people ask me what telescope they should get their kids as a first telescope. Let’s find out why.

Celestron Powerseeker 70AZ telescope

Their First Telescope

That first telescope is much more important that most parents realize as it can help foster an interest in astronomy and science in general, or completely destroy the child’s interest. You probably wonder how that could be, and that is an excellent question.

Let’s look at this a different way; assume your kid wanted to play little league baseball. You went out and bought them a glove and a ball but when it came to the bat you bought one of those foam bats you can hit people with and not hurt anyone. Every time they tried to hit a baseball, the bat would simply flex and never actually make the baseball do anything. Since they never got a hit, always struck out, they would quickly loose interest and give up the game.

Who wants to play a game where you never even have a chance of winning no matter how hard you practice and try? No one, that’s who.

So now let’s switch to astronomy; you buy them a great book on astronomy and a cool map showing where some amazing objects are, then you give them a telescope that even when used by a professional could not identify a car across a football field much less the planet Jupiter in the night sky. It wobbles, it’s blurry, and it is extremely hard to navigate. What do you think their reaction would be? 

The good news is that you don’t have to spend a fortune to get a reasonable telescope that will keep them interested, and this telescope is one of those.

The Celestron Powerseeker 70AZ

The Celestron Powerseeker 70AZ telescope is a refractor telescope with a 70mm aperture on an alt/az mount and is pretty well made for it’s price of around $80. A large part of the telescope and mount are actually metal and have more stability than you might expect from a telescope of this size.

From the minute you unbox the Celestron Powerseeker 70AZ you can tell it is a much better telescope than those cheap department store models. Setup is pretty easy and straight forward consisting of a few thumb screws and requiring no tools.

Celestron Powerseeker 70AZ side view

The current model of the Celestron Powerseeker 70AZ comes with an adequate 5x24mm finder scope (just barely), a 20mm eyepiece, a 4mm eyepiece (useless) and a 3x barlow (also useless).

Celestron Powerseeker 70AZ accessories

You are probably wondering why I like the Celestron Powerseeker 70AZ when I use terms like barely adequate and useless when I describe the accessories. Good question.

Virtually every manufacturer of lower end telescopes these days throws in some junk so that their “specifications” are better than the competitor’s, and the Celestron Powerseeker 70AZ is no exception. It is simply a sales tactic and it does not apply to just astronomy equipment. The last time I bought a toaster oven it came with racks and trays I have never had a use for, but it sure looked cool on the box that it came with all this extra stuff. Same thing here.

I don’t really penalize the Celestron Powerseeker 70AZ for doing what everyone else does, particularly since the quality of the scope is high enough for the price that I could simply throw away the 4mm eyepiece and barlow.

In comparison to other telescopes like the Celestron Powerseeker 80eq, the Celestron Powerseeker 70AZ has a longer focal length making it a better choice for close ups of the moon and viewing planets.

Comparing the Celestron Powerseeker 70AZ to something like a Celestron Powerseeker 127eq reflector telescope it does not require near the cool down time (the 127eq has two mirrors which need to acclimate to the outside temperature before use or extremely blurry images could result) and requires no maintenance or adjustments such as the collimation required by the 127eq. The 127eq also requires learning how to use an equatorial telescope mount whereas the alt/az mount on the 70AZ is pretty much intuitive even to children with no experience. This makes the Celestron Powerseeker 70AZ a better choice for kids and first time telescope users.

Using the scope

Where the Celestron Powerseeker 70AZ shines is actually using the telescope. With the alt/az mount there is nothing to learn, point it at something and look through the eyepiece, simple as that. 

The optics in this little scope are surprisingly good. No, they are not as good as say a $350 Orion Astroview 90mm refractor, but then again they are close enough to ignore considering how much cheaper they are. Images of the moon are very impressive although I would really like to have a moon filter (stay away from Celestron’s own moon filter) to make viewing a little more comfortable.

Saturn and Jupiter are clearly identifiable and a joy to watch, as is the Orion nebula and Andromeda galaxy. From there it is a mixed bag with objects such as the Pleadies being easy to see and pretty spectacular, The Lagoon and Eagle nebulae are quite pleasing but require a bit more effort, while the Ring and Dumbbell nebulae are virtually impossible to get any enjoyment out of with the Celestron Powerseeker 70AZ beyond finding them.

To some extent this can be improved with a couple of better eyepieces but I personally would probably suggest moving to a nicer telescope such as the previously mentioned Orion Astroview 90mm refractor if you find you outgrow the Celestron Powerseeker 70AZ and still want more.

I was originally a little concerned about the plastic rack and pinion focuser but after using it a few times it has proven to be remarkably smooth and tight, allowing virtually no play but still being easy to use. I think that the light weight of the diagonal and eyepiece along with the relatively small size of the telescope tube allows plastic to work well here whereas it would not in a larger telescope.

Speaking of the diagonal, the Celestron Powerseeker 70AZ comes with one made of plastic and a little unusual. Where most diagonals are angled the one included with the Celestron Powerseeker 70AZ is more of a ball shape with two tubes coming out. It also seems to be much more enclosed than a standard diagonal which should help keep dust, dirt and dew out of it over time.

 I am not really a fan of the finder but it serves it’s purpose fairly well. Like all finders, be sure you set it up during the day using a far away object such as the top of a telephone pole, water tower antenna, etc. Once it is adjusted it is acceptable. Of course, no telescope in this price range has a good finder because that would take money away from making the actual telescope better and we do not want that. You can do without a finder, but a terrible quality main telescope will just make the whole thing a waste of money, and the Celestron Powerseeker 70AZ is certainly not a waste.

Final thoughts

You will be hard pressed to find a better first telescope for a beginning astronomer. I really like to recommend the Celestron Powerseeker 70AZ because it is inexpensive, light weight, breaks down and stores small, requires no maintenance and provides more than adequate views of the most popular objects in the night sky. 


Share this post! Facebooktwitterredditpinterestlinkedintumblrmail

Explore Scientific Diagonal DD02-00CF Review

Quite a while back I received an Explore Scientific Diagonal model DD02-00CF with a telescope and was less than impressed. It gave terrible views and made odd noises when you rotated it in your hands. I didn’t think much of it as I had a very nice Orion 8727 2-Inch Dielectric Mirror Star Diagonal which I was using so I just chunked the Explore Scientific Diagonal in a box.

Lots of time passed and I really wanted to have another nice diagonal to leave in a refractor that sits on a mount in my living room all the time. I had recently upgraded its focuser to a nice 2″ dual speed crayford and wanted it to have its own diagonal all the time, it was a grab and go scope.

So I pulled out the Explore Scientific diagonal and was determined to figure out what was going on. Although I had an explore scientific refractor telescope, the AR127, and it was not a bad scope for the money, I really didn’t see how they could have that bad of a diagonal (it was worse than the super cheap one that came with little beginner telescopes, by quite a lot).

I started by double checking my memory to make sure it wasn’t me since I really did not spend a lot of time with it back then because I didn’t have a use for it. Taking it out and turning it over in my hand, sure enough, there was a clanking and some rattling. A quick view up to Orion in my grab and go telescope confirmed what I remembered, terrible views.

Back inside I took a close look at the Explore Scientific Diagonal and saw four allen head screws in the bottom which all appeared to be loose. I found an allen wrench that fit and very slowly attempted to tighten them. Since I did not really know what they did (although I had a suspicion) I put virtually no pressure at all on the wrenches, only attempting to run them in until there was any resistance at all.

Explore Scientific Diagonal bottom view

Two screws on one side met some resistance so I stopped immediately, the two on the other side seemed to offer no resistance at all and I finally stopped once I felt that they would come out inside the diagonal. This was really confusing.

At this point I felt I had nothing to lose so I decided to disassemble the entire Explore Scientific Diagonal

Explore Scientific Diagonal side view

To start with each side has three allen head screws holding the side plate on. Once the screws are removed it is still a little of a challenge to get the sides off as they appear to be stuck. The challenge was getting the side off without throwing the rest of the diagonal across the room. I found that removing the portion of the diagonal that fits into the telescope tube by turning it counter clockwise helped considerably as I could put a finger into the hole and push out on the side plate.

At this point I could clearly see what all was going on and why the Explore Scientific Diagonal did not perform like it should. 

The mirror inside is in a bracket which is held to the housing by two screws on each side. The allen screws on the bottom of the diagonal then screw up into the housing and press against the back of the mirror allowing you to align it. This was what I had assumed so it was nice to get some confirmation, and this is also why when I was tightening those allen screws I put no pressure at all on the screws.

Explore Scientific Diagonal inside view

The problem as I found out was that the mirror holder is very thin plastic. How thin? 1.44mm according to my calipers. To give you some perspective, the side plate whose sole job it is is to keep out dust and light measures 1.8mm. For those of you who are in the US, between the thickness of a dime and a penny. 

This means that the entire weight of the mirror is being supported by two pieces of plastic like that, one on each side. Just a tad too much force on the allen screws or one really good bump and they would easily snap, which this one did, probably in shipping since it was defective when I received it.

Now I am a firm believer in the fact that if you make enough of anything, you will make a bad one. No big deal, get it fixed and move on. I will never fault a company for a single defective item, or even several of them if they take ownership and fix it, stuff happens. 

The problem here is not with the fact that I received one that is broken, that could have easily been the delivery driver dropping my package off the back of the truck, hardly Explore Scientific’s fault. 

The problem with this Explore Scientific Diagonal is with the idea of holding that mirror with that little thin piece of plastic in the first place. Any engineer (or even someone who slept in a Holiday Inn Express last night) should immediately know that is a bad idea even if the mirror did not have adjustment screws behind it that could potentially be over tightened. Add in those adjustment screws and that is just blatant stup…… nope, not going to say it.

So why not just get it replaced under warranty and move on? The warranty on this Explore Scientific Diagonal has expired and even if I got a new one, if it had the same design I would not want to use it in fear of it breaking in the field. I am too old to play the break -> warranty -> break ->warranty game. 

Conclusions on the Explore Scientific Diagonal

There is so much good quality stuff out there today for me to put up with stuff made like this, particularly since it carries a premium price tag. Sure, it is cheaper than a $320 Tele Vue Everbrite 2″ diagonal, but when you can get a 2 dielectric diagonal like the Solomark 2inch Explorer Enhanced Dielectric Diagonal for under $100 or get a really nice Orion 8727 2-Inch Dielectric Mirror Star Diagonal for around $150, why put up with this one?

Since I personally have had less than stellar dealings with the explore scientific company, had mediocre experiences with their telescope, and now this issue with their star diagonals, I am going to steer clear of their products personally.

I hope you enjoyed this explore scientific diagonal review!


Share this post! Facebooktwitterredditpinterestlinkedintumblrmail

The Virgo Supercluster, a neglected jewel in the night sky

Whenever I see other people observing or imaging and ask them what they have their scope pointed towards, it is almost always some single object or a pair of objects. It might be a nebula, galaxy, or they may be splitting double stars, but few of them think of the Virgo Supercluster.

The Virgo Supercluster is a group of approximately 47,000 galaxies situated just outside the constellation Virgo. Although there are a lot of superclusters in the universe, this is probably the most studied and certainly is the most amazing to view.

I am not really sure why I never paid much attention to it, and I admit it never even occurred to me until I ran across a description of it in a book I was reading. It sounded pretty interesting so I took a quick look and was amazed. Then I imaged it, oh wow!

The part of the Virgo Supercluster that was the most interesting was an area called Markarian’s Chain. This was a little section that all fits into one low power eyepiece or a single image and contains such prominent members as Messier 84 and 86 in the lower left of the following image.

This is one of those targets that can just make you stare for hours picking out little details one right after another. Find a fuzzy spot, open your star chart and see what it is. Another galaxy!

The name Markarian’s Chain comes from the American Astrophysicist Benjamin Markarian who in 1960 noticed that several of the galaxies in the chain seemed to move together, as if connected. 

Many members of the chain were discovered well before 1960 such as the two Messier objects being discovered by Charles Messier in 1871 and many others being noted in 1888 by John Louis Emil Dreyer in his New General Catalog.

While the primary members of the chain are M84 (NGC4374), M86 (NGC4406), NGC4477, NGC4473, NGC4461, NGC4458, NGC4438 and NGC4435, there are many others as you can see in the image above.

Both of the Messier galaxies and most of the NGCs can be seen in a small telescope from a reasonably dark site while the IC and PGC galaxies require a little bigger telescope to see as anything more than maybe a speck of light.

Opening up Stellarium and pointing it to the Virgo Supercluster we see a lot of objects. I have surrounded the area of Markarian’s Chain with a yellow box in the image above so you get an idea of how large the area is, and how many objects are in it. Even what is shown here by Stellarium is not the full area of the Virgo Supercluster, but is the majority of it.

Note that in the above image only Messier, NGC, and PGC objects are shown, IC and other catalogs are not.

To find the Virgo Supercluster, look north of Virgo between Virgo, Coma Berenices, and Leo. Trust me, once you get close with your telescope it will be hard to miss!

Hopefully you will see that the entire area of the sky around the Virgo Supercluster, and Markarian’s Chain in particular, are worthy of some of your observing and/or imaging time.


Share this post! Facebooktwitterredditpinterestlinkedintumblrmail

Moon globe from Sky & Telescope review

If you are in the market for a moon globe, there are only a few real choices. One of the most popular of those choices for years has been the Sky & Telescope moon globe.

Sky & Telescope moon globe

Even as a child, long before becoming an astrophotographer, I was fascinated by the moon. As a kid however things like a globe of the moon was just out of the question. Now that I spend a good portion of my time on astronomy related endeavours, I found room on my desk for another little toy, my own moon globe.

I wanted something that was of course fairly accurate, and something that was large enough to actually be used as a globe. Sure, like most astronomers and astrophotographers I have maps, charts, and programs that will show me every inch of the lunar surface. That is just not the same as seeing where things are in relation to one another, and in relation to the entire sphere. 

Once I narrowed it down to the globes that were reasonably current and around 12″ in diameter, that left me with three choices; the Sky & Telescope model, the Replogle model (probably made the S&T one too) and the Watanabe 3063.

The S&T model moon globe was the best looking sporting a dark gray color, it also had excellent reviews. It is hard to argue with Sky & Telescope, they are very high up the food chain in astronomy circles. The other two, not so much. The S&T one went for $99, not too much.

Replogle moon globe

The Replogle moon globes I found were a little cheaper, but seemed based on an older lunar map, and also had more complaints about fit and finish. I thought this odd because it sure looked to me that they were made by the same people that made the S&T globe, right down to the base. This globe came in at around $80.

Watanabe globe

Lastly, there was the Watanabe 3063 which is a color moon globe where the colors denote the heights of the surface features. The Watanabe is the only topographic moon globe in this roundup. This moon globe supposedly uses data from the Japanese Kaguya spacecraft to make the mappings extremely accurate.

Closeup of the Watanabe globe

Indeed if you look close at this lunar globe, it appears to be extremely detailed, and it should be for the $175 asking price.

I decided to go with the S&T model for now as the more realistic appearance of this moon globe was more important at the time than the hyper detailing on the Watanabe model.

The globe arrived in excellent condition directly from S&T. The assembly consisted of taking the globe out, taking the base out, and setting the globe on the base. 

Sky & Telescope globe closeup

Detail on the globe is very good, everything I was expecting. To see all the detail I needed a magnifying glass, and even with that, the detail holds well. With enough magnification you can of course see the pattering in the printing, but that is at such a magnification that it does not detract from exploring the surface at all.

Seam running across the globe

This moon globe and the Replogle one both have an obvious seam running around the equator of the moon. Once you get one at look close, you can easily see this is where two images have been taped together. No attempt has been made to hide this fact, and it stands out pretty obviously even from a distance. This would be my main complaint with this moon globe.

In comparison, no picture of the Watanabe globe I have seen seems to have any seam at all. This may be the feature that drives me over the edge and forces me to lay down the money for the more detailed, color coded, Japanese globe.

Overall however, I am happy with my purchase, it was the best moon globe for me. It may not be as detailed as one, and more expensive than the other, but I think it strikes a nice balance and looks dang good sitting on my desk. The Replogle is too light colored, and the Watanabe is too multicolored, to pull off what I was looking for. You however, may have something entirely different in mind with your moon globe so those may be a better fit.

If you like the S&T moon globe, you might also look at their other globes, such as the their ones of Venus, Mars and Pluto.

I hope you enjoyed my review of my new Sky & Telescope Moon Globe!


Share this post! Facebooktwitterredditpinterestlinkedintumblrmail

Orion XT8 SkyQuest 8″ Dobsonian Telescope Review

I have had an Orion XT8 SkyQuest 8″ Dob for a few years now and it has held up well. This telescope has offered up a nice view of a lot of objects but for some reason I have never written about it. Let’s change that. Here is a short Orion Skyquest XT8 review.

Orion XT8 Classic Dobsonian Telescope

Orion 8945 SkyQuest XT8 Classic Dobsonian Telescope

I bought this telescope several years ago and paid less than the Orion Skyquest XT8 price on Amazon, but like most things, prices have gone up a little and they have changed the scope a little. My old Orion XT8 came with a couple of eyepieces and I believe one of Orion’s Deepmap 600 maps which I love. The new one has eliminated one eyepiece and the map, but thrown in a few enhancements we will look  at.

This is the older version which only had a 1.25″ rack and pinion focuser whereas the newer ones seem to come with a 2″ crayford which I can say would be a huge improvement. While this older focuser is not nearly as nice and I can’t use it with 2″ eyepieces, it is still a solid unit.

The newer versions of the Orion XT8 and  my version both come with a red dot finder which is really cheap and flimsy. I much prefer Orion’s Orion EZ Finder Deluxe which sadly is not available any more. You can however get a Astromania Finder Deluxe Telescope Reflex Sight from Amazon which is almost an exact copy, yea!

The best thing about this scope is that it is a solid scope, both in build quality and image quality. My Zhumell Z8 scope is a much nicer scope to use than this Orion XT8 and came with better accessories, but for the money, this is an awesome starter scope and no one will regret buying one. 

Orion’s technical support is also first rate and should you run into any problems, the solution is a quick phone call or email away. You probably won’t need that however because this Orion XT8 is not only well built, but drop dead easy to assemble and use as well.

Opening the Orion XT8 box you find the tube in one section and the base/parts in another. Assembling the base was a simple matter of three side pieces and the bottom, along with a hand full of allen head screws for which they provided the tools. 

Orion XT8 unboxed

Once the base was assembled, you can just set the tube in the base and attach the side springs which put tension on the setup so the scope stays where you put it. Other telescopes I have used have adjustable tension while this one does not, but I fail to think of a scenario that a typical beginner would get into where that would be a problem. In fact, the only time I have used my tensioners on my Zhumell Dob is when I was doing something the telescope was never designed to do in the first place so I am not going to penalize the Orion XT8 for not having it.

About the only thing left is to slide the finder into the slot for it and tighten it down, then grab the eyepiece and start looking around.

Initial thoughts on moving the scope around are that it is pretty smooth in both altitude and azimuth movements. Years later, it is still remarkably smooth. As smooth as the more expensive scopes that use high end ball bearings for everything? Well no, but for much less expensive scope it is more than smooth enough and seems to keep that smoothness over the years. Using the teflon (I am assuming) pads on the altitude might actually be a really good thing as bearings can wear out and possibly corrode, the pads probably will not.

One of the down sides to any Dobsonian telescope, including this Orion XT8, is the cool down time. This is the time it takes for the telescope mirrors to adjust to the temperature outside. Typically you take the telescope from an air conditioned inside to an outside viewing location and the temperature can vary between the two locations by up to forty degrees. This temperature variance causes terrible viewing as the mirrors cool down (or warm up). Once the mirrors have equalized, the viewing is exceptional. Although not included with the scope, Orion does have a cooling fan that attaches to the back of the Orion XT8 to help it cool down faster.

Although I much prefer dual speed crayford focusers in my telescopes, the single speed rack and pinion in my Orion XT8 is pretty nice, and very functional. The newer single speed crayford in the new version of the Orion XT8 I am sure is an excellent focuser. Users I have talked to say it is very fast and smooth and a real improvement over the rack and pinion design.

25mm Plossl eyepiece that comes with the Orion XT8

The 25mm eyepiece provided with the scope is a solid eyepiece for a beginner and provides excellent views of the moon, Andromeda galaxy, Orion nebula, and a host of other popular beginner targets. Unfortunately this one eyepiece choice can leave someone a little lacking so I would suggest you get an Orion moon filter and an Orion 12.5mm Sirius Plossl eyepiece to round things out.

Orion gives you a coupon for a download of some astronomy software included with the Orion XT8. I am not a fan. You can get Stellarium for free off the internet but really, who has a computer out next to their telescope unless they are doing astrophotography? Better options include Orion’s own Deepmap 600 which is awesome in the field, a nice Planisphere (be sure to select the right one for your location!) or any number of excellent phone/tablet apps.

If you wanted something a little nicer you could always go with Orion’s XT8 Plus. When looking at the orion xt8 vs xt8 plus, the plus includes adjustable tension, secondary mirror thumbscrews adjusters, two eyepieces, a 2x barlow and a dual speed crayford focuser for just $100 more:

Orion XT8 PLUS Dobsonian Reflector Telescope

Orion SkyQuest XT8 PLUS Dobsonian Reflector Telescope

Whichever Orion XT8 you decide on, you will have a telescope that should last for many years and provide excellent views.

I hope you enjoyed my little review of the Orion XT8 Dobsonian telescope!


Share this post! Facebooktwitterredditpinterestlinkedintumblrmail