Keeping warm while observing or imaging

It is time to start thinking about keeping warm while observing and imaging as winter is right around the corner. Observing is a very low energy activity. During the winter when views are the best you will be shocked at how cold you can get when you are not moving. Even in warmer climates like down here in Texas where a really cold winter night might typically hit 20F, it is amazing how cold you feel when you haven’t really moved in hours.

The key is to always take far more warmth than you expect to need and to layer. My rule is that if I am comfortable walking out my front door and sitting on a deck chair for fifteen minutes, I need at least four times that much clothing/blankets.

Yes, this sounds like overkill but if you wear too many layers you can just peel one or two off. If you do not bring enough, you have to pack up and go home. Which would you rather be prepared to do?

Clothes for keeping warm while observing

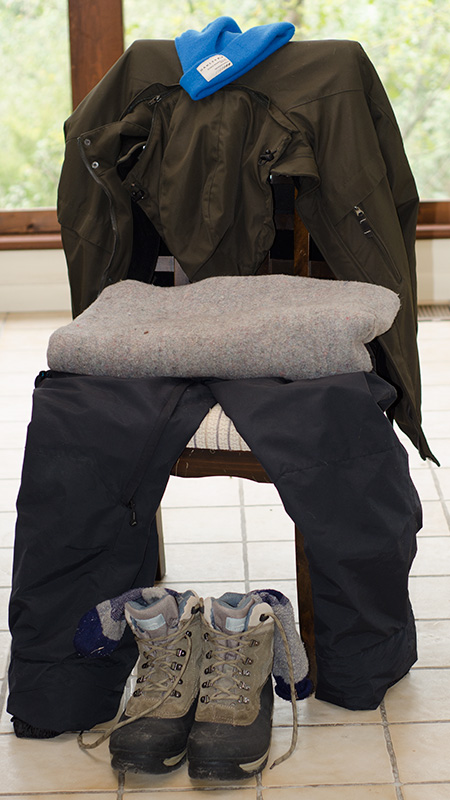
When I will be out all night and the temps will be below 30F I wear two layers of long thermals, pants, ski pants, socks, wool socks, insulated boots, shirt, sweatshirt, fleece jacket, heavy jacket, scarf, gloves and hat. As if that is not enough I carry two wool blankets and an electric blanket as well.

Silly? As long as I am keeping warm while observing you can call me anything you like. Every hour you spend out there bleeds off heat. You are far colder at the end of the first hour than if you sat on your deck for fifteen minutes. You are far colder after eight hours at a dark site than any deer hunter after sitting in a stand for two or three hours.

Thermoses

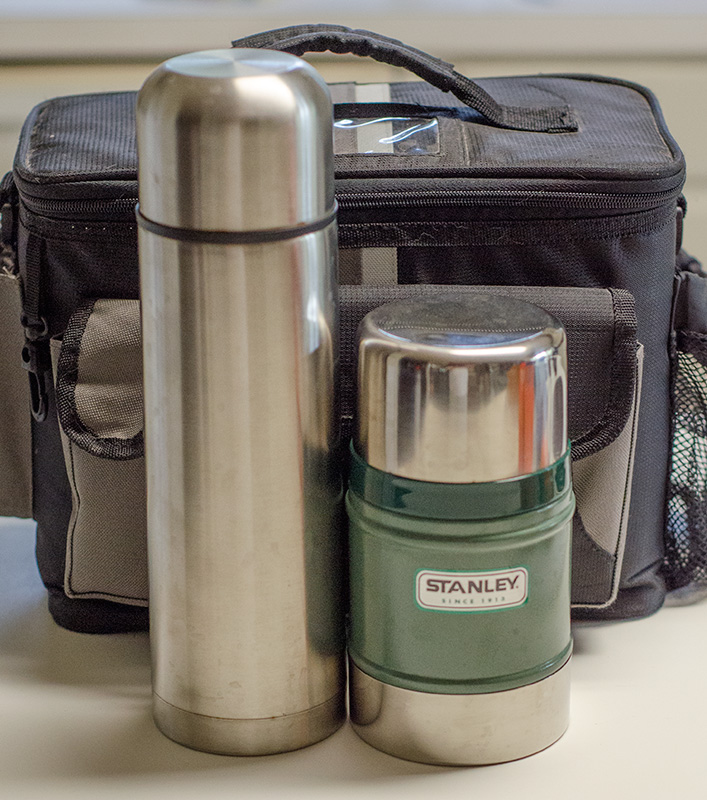
Two things that help are a thermos full of hot chocolate/coffee and another one with some hot soup. Stay away from alcohol as it may make you feel warmer right as you drink it but it actually causes your body temperature to drop (that was a really fun experiment that the television show Mythbusters did).

alcohol

What you want to avoid is anything that generates enough heat that it might affect your viewing/imaging. Things such as space heaters, or firepits are really bad ideas. Fire is particularly bad as not only does the rising heat waves and light cause problems but the ash floating in the air will cause visual/imaging issues and will tend to coat everything within a much larger area than you think. I will be the first to admit doing some binocular viewing on a crisp night with a roaring firepit is a lot of fun, but I certainly will not be setting up my serious equipment anywhere near a fire. Keeping warm while observing is not worth having to spend an hour cleaning all my equipment and having poor quality images.

If the cold begins to get to you while imaging you can always retreat to your car. I would not start it, as the lights and heat waves rising from the vehicle could cause problems with your imaging. You certainly will be warmer inside an enclosed vehicle even if it is not running. If you are at a site that has AC power you could even run an extension cord through a cracked window and use it to power your electric blanket.

I hope some of this will give you ideas for keeping warm while observing.


Share this post! Facebooktwitterredditpinterestlinkedintumblrmail

Historical Astronomy Equipment

Recently I became interested in astronomy equipment that was, shall we say, less than modern. I was enthralled with the way they used to do things we we take for granted today, such as tell time.

I live about an hour drive from Plantersville, Tx, home of the Texas Renaissance Festival. The Ren Fest as it is popularly known is like a theme park based very roughly on a renaissance time period European town with inhabitants dressing as people from all over the world in that general era. There are a ton of shops (over 300 I read somewhere), shows and rides. One can spend the day watching jousting, see a falconer, ride a camel, shoot a bow and arrow, visit a period tavern (or twenty) and listen to live music. It runs every weekend in October through November and really is a lot of fun.

This year my wife and I went and I was fascinated with a few pieces of astronomy equipment for sale I thought I would share with you.

The first item is an Astrolabe. What is that you may ask? It is a device used to calculate and predict the positions of celestial objects including the sun, moon, planets, and stars. You can think of it as one of the first handheld astronomy calculators or computers. It was also used to determine the local time, for surveying and triangulation. It was first used around 150BC and continued use into the 15th century.

An astrolabe, an early piece of astronomy equipment

The front and rear of my 4″ bronze and pewter astrolabe.

There is a shop that has a lot of this kind of stuff, all hand made in the workshop of Norman Greene from Berkeley California. The astrolabes came in a variety of sizes with the 4″ I bought being the second largest I remember. They also come in a few finishes including a monotone pewter, monotone bronze, this dual tone bronze/pewter and a gold plated monotone. I opted for the dual tone because I thought it was much better looking and easier to read. I also took the display model instead of a new one as the use gave it a lot of character. I also bought the optional stand you see in the images above.

Included with this device is a book describing a variety of basic astronomy uses such as finding the time, showing the position of stars and more. While giving the instructions is well beyond the scope of this blog post I will give you some of the instructions so that you get an idea of how it can work.

To find the elevation of the sun during the day, hold the device about waist level by the included chain or ring through the top. Rotate the pointer on the rear of the device so that the shadow of the leading part is centered on the rear part of the pointer. This gives you the sun’s elevation in degrees as read on the outer ring where the pointer is pointing (approximately 51 degrees in the image below).

astrolabe4

This calculation can be used to further determine the time of day or night (using a star instead of the sun). I don’t pretend to be an expert with this thing but I am certainly having fun learning how it works.

As an aside, mine has a single plate and there are versions with many plates that supposedly can do advanced stellar calculations. If I ever get good with this one I might move to the more advanced model, we will see.

Up next is an Aquitaine Sundial, or Shepherds Watch. This is a much simpler device to tell time which looks like a large ring. I did not purchase this from the Ren Fest as I had already spent too much money on the astrolabe and did not want to push my luck with this too as the wife was already looking at me funny. Instead I bought my Aquitaine Sundial from Amazon.

Aquitaine Sundial

My Aquitaine Sundial.

To use one this amazing piece of astronomy equipment, simply adjust the center brass ring to align the hole with the current month marked on the outer pewter colored ring. Holding the device by the included strap/necklace point the hole towards the sun and look where the bright light shines through the hole and onto the scale marked on the inside of the ring. This should show the current time.

The one downside of this simple astronomy equipment is that it has to be made for a specific latitude. The one I have is designed for about 40 degrees north latitude (about the center of the US). Unfortunately I live just over 30 degrees, which means I have to make adjustments to get it to show approximately the correct time. It is still a fun thing to whip out at astronomy events and have people ask you how it works.

Star gazing equipment like this sure does make you respect the ingenuity of renaissance scientists.

You can read more about the Renaissance period at Wikipedia.


Share this post! Facebooktwitterredditpinterestlinkedintumblrmail

Pluto finally gets a face!

I admit it, I am one of those people who has a bumper sticker that reads “Pluto is SO a planet!” I grew up with nine planets, Mercury through Pluto, and no group of astronomers (not planetary scientists!) was going to kill that childhood memory. Yes, it is irrational, sue me. Regardless of it’s current planetary status the object known as Pluto is the furthest object we have visited and taken close range photographs of, and it is not at all what we thought. Lets start with the probe we sent, New Horizons.

newhorizon1

Launched on January 19th, 2006 from Cape Canaveral Florida on the back of an Atlas V rocket it took nine long years to reach it’s ultimate target. At around one thousand pounds Sir Patrick Moore made comment that it resembled a piano glued to a cocktail bar-sized satellite dish.

pluto-mosaic

The closest images were taken at approximately 7,800 miles above the surface of Pluto on July 14th, 2015. Data took about thirteen hours to travel from the spacecraft back to Earth making the first images from this distance arriving early in the morning on July 15th, my birthday!

Pluto

What is fascinating is that just when you think you know what is out there, science throws you a curve ball. We expected tons of craters since it is near the Kuiper belt, we see few. We expected a fairly featureless ball of ice, we see mountains, valleys, and a huge smooth area being called the heart. This heart shows in false color as two distinct areas that could be caused by geologic activity, or surface erosion. Amazing. There is still more data to come and it will be slowly streaming in and being processed for quite some time, around sixteen months to be a bit more accurate. Stay tuned to NASA for more!

More information on New Horizons and the latest pictures of Pluto are on NASA’s website.


Share this post! Facebooktwitterredditpinterestlinkedintumblrmail

You don’t have room to carry a telescope?

One of the concerns I hear from potential astronomers is that they have to travel to a dark site to do any serious observations or astrophotography and they just don’t think they can haul that much equipment. Sometimes it is a matter of driving a small vehicle, sometimes a matter of weight they have to carry. Either way I can usually talk to them a little and help dispel their concerns.

Lets start by saying you can have a lot of fun with nothing more than binoculars which can be worn on a strap around your neck. Whether walking, riding a bicycle, a motorcycle or a car, there is no excuse for not participating with binoculars. Often I have two pair of binoculars with me when I go out for a night. They are too easy to just throw into the back of the car or in the backpack. Many astronomy clubs even have Messier events where observers attempt to view as many Messier objects as possible in one evening with only binoculars. Even for seasoned astronomers this can be a really fun event and is often combined with cookouts or outreach programs.

binos

In many countries motorcycles are an extremely popular method of transportation for the majority of people, and indeed in the US they are fairly popular with college aged people for their great gas mileage and affordability. Unfortunately there is no way to do any astronomy beyond binoculars when you only have a motorcycle, right? Wrong. Assuming you are not pulling a trailer with your motorcycle (which would allow you to carry a full astrophotography kit without a problem) you still have room for much more than just a pair of binoculars. In fact, here are two options I can carry on my motorcycle should I want to take it for a night observing.

backpack

First is an iOptron SmartStar E R80 setup which was designed to be portable and is even featured in my Getting Started: Budget Astrophotography book. Included is the tripod, go-to mount (and they have a GPS version as well), all electronics running off battery power, camera, several eyepieces and remote shutter release. This entire kit fits without issue and will easily go on just about any motorcycle or even a bicycle as it mostly fits into a medium sized backpack.

bikes

Next is something a little bigger, an Orion 90mm refractor, and an older version is featured in my book Getting Started: Using an Equatorial Telescope Mount. While this simple EQ mounted telescope and has no computer or electronics at all, it is still a very nice little visual setup to grab and go on an unexpectedly clear night when you just want to run out for a couple hours.

So what about small cars? I drive a MINI Cooper S Countryman which although not the smallest out there I believe qualifies as a “small car”. I regularly carry my full astrophotography rig, table, two laptops, fan (for summer), blankets (for winter), chair, cooler, and on occasion a second telescope or AP setup.

room6In the above image, everything but my laptop and cooler which are in the front seat are in the back. There is still plenty of room for a complete second observing telescope/mount combination.

Family cars can be used as well without sacrificing the back seat. My 8″ dobsonian with all my eyepieces, accessories, chair, table, computer, cooler and much more all fit neatly in the trunk of my Wife’s Buick. We could still carry five full sized adults.

There certainly are limitations but you should never think that you can not do any real astronomy or astrophotography because of what you drive, ride or even if you walk.


Share this post! Facebooktwitterredditpinterestlinkedintumblrmail

Comet Lovejoy C/2014 Q2

Comet Lovejoy was a fantastic comet to both image, and view in medium telescopes.

Comet Lovejoy C/2014 Q2

The image above is my best image from Comet Lovejoy 2015, a single frame taken on February 18th at 8:27pm CST. Comet Lovejoy was discovered by Terry Lovejoy with an 8″ SCT telescope on August 17th 2014. Anyone who thinks that they can’t contribute to astronomy with their little telescope should take note that Terry has discovered five comets so far with his Celestron 8″ SCT mounted on a Vixen Sphinx mount. His equipment is readily available to any amateur astronomer. Admittedly that in addition to a CCD camera is a little more money than many people want to spend (around $4,000 US to start).  It certainly is far less than what most people think of when they think of the telescopes used to discover comets and get them named after you.

Imaging & Viewing Comet Lovejoy

I had a lot of fun imaging Comet Lovejoy for two hours on one telescope while I observed it in two other telescopes (my 127mm refactor and the college’s 16″ SCT). With a reasonable quality eyepiece it was pretty easy to see and with a high quality eyepiece that helped to increase the contrast the tail just jumped out at you. When I was viewing it the comet was roughly magnitude 4 making the nucleus (the central region) a naked eye object from a dark site and easily observable with binoculars. When looking at the area it looks like just another star until you really stare and see that it is a little fuzzier than the other stars around it. Once you lift your binoculars up however, it becomes quite obvious. These are the objects that are great fun to take the kids out to see or to go knock on your neighbor’s house and let them have a look. Nothing builds interest in astronomy like this! I can only hope that the next comet to pass earth is this spectacular.

More information and images of Comet Lovejoy C/2014 Q2 can be found on Wikipedia.


Share this post! Facebooktwitterredditpinterestlinkedintumblrmail

Observing the moon in daylight

Moon in daylight? You have seen it, I have seen it, it is broad daylight and there in the sky is the moon. If you stop and think about it you realize that the moon is up in the daytime just as much as it is at night, we just don’t tend to notice it. In my opinion this is a direct result of the fact that the moon has a much higher contrast at night since it is the only rock we see directly illuminated by the sun.

moon in daylight when imaged

The picture above was taken during the day on March 31st 2012. It is a stack of images run through registack to improve detail and sharpness. Yeah, it might be a little too sharp, but that’s OK with me.

One question I always get asked is if I shot that picture in the daylight, why is the sky black? Remember that the moon is very bright, even the moon in daylight is a light gray rock being lit by the sun. The atmosphere is lit by scattered light. In order to darken the moon so that it is not just a white blur you have to reduce the amount of light hitting your camera sensor. This reduction not only darkens the surface of the moon but the sky around it as well. If you look close you will see that the sky around the moon in the above image is not really completely black although it is very dark.

What the moon in daylight to our eyes

In this picture you can see the blue sky, but the moon is way too bright. This is why when you take an image and want to be able to see the surface details you need to darken the image.

What does this mean if you just want to observe the moon in daylight and not take pictures? Remember that moon filter or polarizing filter you use at night? Yup, use that in the day too. The amount of sunlight bouncing off the moon is the same whether it is also shining on you (daytime) or not (nighttime).

If you don’t have one or you want a really nice one there are a few options. First you can purchase neutral density filters which simply reduce the amount of light by a specific amount. The trick is that these reduce all colors of light equally making your view darker, but still correct. You can get both a Baader Planetarium Neutral Density 2″ ND 3.0and a Baader Planetarium Neutral Density Filter 1.25″ ND 3.0 which covers either 2″ or 1.25″ needs. Note the ND 3.0 specification as there are ND 0.9 and ND 0.6 versions as well. The 3.0 is the darkest of them and if you are going to bother I would get the darkest to start with.

You could also go with a variable polarizer which can provide a similar experience. It works by removing stray light that comes in a different angle and only allowing direct rays of light. These can make for sharper images by reducing glare and stray light but often do not cut light as much as the neutral density filters listed above. They also come in both sizes as well such as the Orion 5562 2-Inch Variable Polarizing Eyepiece Filter and the Orion 5560 1.25-Inch Variable Polarizing Filter.

I enjoy viewing the moon in daylight in winter as it is much warmer. Just remember that the seeing conditions are typically worse in the day than at night. This is minimized in the winter when you have the cold crisp air but the light scattering off of particles in the air still present an inferior image in daylight as compared to night.

moon in daylight over some trees

This still is a great way to do some outreach without having to have a group of kids and their parents tripping all over your equipment in the dark in the library parking lot. It is also a lot of fun to observe while waiting for it to get dark so you can observe or image other targets.

When you are ready to do some exploring you can use Sky & Telescope’s Field Map Of The Moon or the Sky & Telescope’s Mirror-Image Field Map of the Moon. I never go out without one of these in my astrophotography kit. These little laminated maps are fantastic for identifying features without getting so detailed as to be overwhelming.

Where do you look? Before the full moon, look in the afternoon. After the full moon, look in the morning. Regardless go outside and look up into the sky!


Share this post! Facebooktwitterredditpinterestlinkedintumblrmail

Carl Sagan’s Birthday!

One of my childhood hero’s, Carl Sagan was instrumental in getting me and keeping me interested in science and astronomy in particular. I still remember my father and I watching the TV show Cosmos in the late 1970s. It, like any TV program back in those days, was a big family event which sometimes included popcorn or actual TV Dinners on a TV tray (this did not happen very often). Carl Sagan On November 9th, 1934 in Brooklyn, New York, astronomer, astrophysicist and cosmologist Carl Edward Sagan was born to Russian immigrant Samuel Sagan and New York housewife Rachel Molly Gruber. Sagan’s interest in science was ignited at the 1939 New York World’s Fair at the age of four. That fire was continued with his exploration of the public library at the age of five. He was looking for a book about stars. He also took trips to the American Museum of Natural History with his friends at the age of six or seven, again looking for books. His education included a bachelor’s degree in 1954, bachelor’s degree in physics in 1955, Master of Science in physics in 1956, and a PhD in both astronomy and astrophysics in 1960. His popularization of science kicked into high gear with the writing of Cosmos. The book was made into a very popular television documentary named Cosmos: A Personal Journey.

Cosmos The show consisted of thirteen episodes and originally aired in 1980. Cosmos has won an Emmy, a Peabody Award, and been seen in more than sixty countries by over half a billion people. This was so popular that it has been rereleased multiple times worldwide with the latest being the digitally restored and remastered 2009 five-disc DVD set in the UK. His show even sparked a spinoff Cosmos: A Spacetime Odyssey [Blu-ray] hosted by Neil deGrasse Tyson who was an acquaintance of his. Sagan’s widow, Ann Druyan who was a coproducer of the original series is an executive producer on the new series.

He wrote several other science related books including A Pale Blue Dot in 1994 as a sequel to Cosmos. His book The Dragons of Eden: Speculations on the Evolution of Human Intelligence even won a Pulitzer Prize. Sagan was also a science fiction author writing such books as Contact, which was made into the movie Contact [Blu-ray] or Contact (DVD) starring Jodie Foster and Matthew McConaughey. This movie won the 1998 Hugo Award for best dramatic presentation. 

Carl Sagan was the designer of the gold plaques containing the universal message from Earth on two Pioneer spacecraft as well as the gold record on the Voyager spacecraft. Many of his theories and ideas have been proven over the years including the surface conditions of Saturn’s moons Titan and Europa and his ideas on global warming.

One of Sagan’s greatest passions was the search for extraterrestrial life. He served on the SETI Institute Board of Trustees. He was one of the founders of The Planetary Society with Bruce Murray, and Louis Friedman in 1980. The society promotes and participates in astronomy and planetary sciences. It is quite possible that no other person in the history of astronomy has been as successful at popularizing astronomy and science in general as Sagan. Carl Sagan passed away on December 20th, 1996 at the age of 62.

carl sagan Happy birthday Carl Sagan, we miss you!


Share this post! Facebooktwitterredditpinterestlinkedintumblrmail