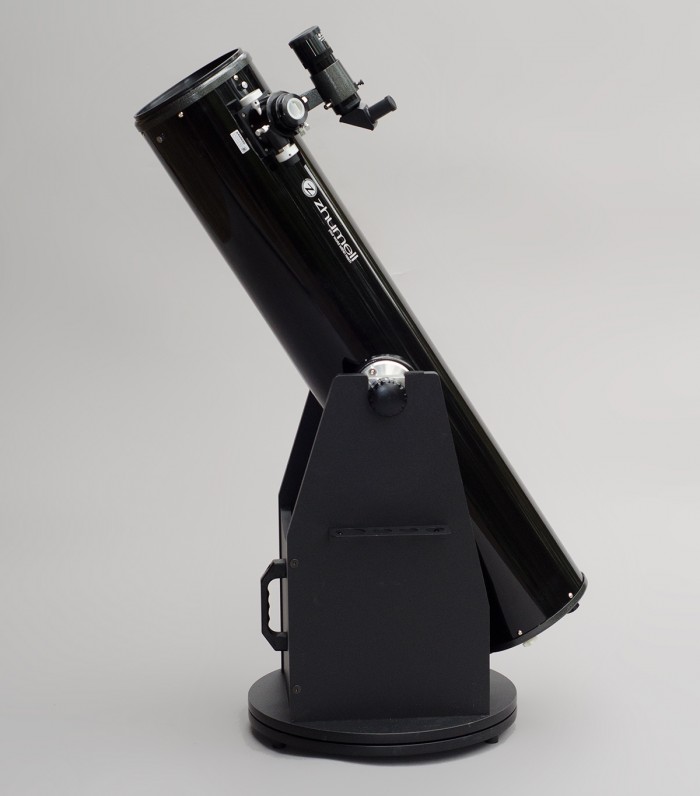
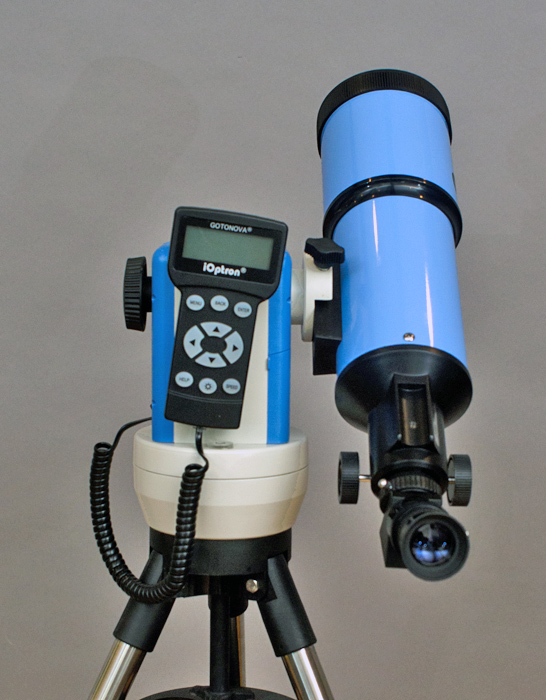
Orion XT8 SkyQuest 8″ Dobsonian Telescope Review

I have had an Orion XT8 SkyQuest 8″ Dob for a few years now and it has held up well. This telescope has offered up a nice view of a lot of objects but for some reason I have never written about it. Let’s change that. Here is a short Orion Skyquest XT8 review.

Orion XT8 Classic Dobsonian Telescope

Orion 8945 SkyQuest XT8 Classic Dobsonian Telescope

I bought this telescope several years ago and paid less than the Orion Skyquest XT8 price on Amazon, but like most things, prices have gone up a little and they have changed the scope a little. My old Orion XT8 came with a couple of eyepieces and I believe one of Orion’s Deepmap 600 maps which I love. The new one has eliminated one eyepiece and the map, but thrown in a few enhancements we will look  at.

This is the older version which only had a 1.25″ rack and pinion focuser whereas the newer ones seem to come with a 2″ crayford which I can say would be a huge improvement. While this older focuser is not nearly as nice and I can’t use it with 2″ eyepieces, it is still a solid unit.

The newer versions of the Orion XT8 and  my version both come with a red dot finder which is really cheap and flimsy. I much prefer Orion’s Orion EZ Finder Deluxe which sadly is not available any more. You can however get a Astromania Finder Deluxe Telescope Reflex Sight from Amazon which is almost an exact copy, yea!

The best thing about this scope is that it is a solid scope, both in build quality and image quality. My Zhumell Z8 scope is a much nicer scope to use than this Orion XT8 and came with better accessories, but for the money, this is an awesome starter scope and no one will regret buying one. 

Orion’s technical support is also first rate and should you run into any problems, the solution is a quick phone call or email away. You probably won’t need that however because this Orion XT8 is not only well built, but drop dead easy to assemble and use as well.

Opening the Orion XT8 box you find the tube in one section and the base/parts in another. Assembling the base was a simple matter of three side pieces and the bottom, along with a hand full of allen head screws for which they provided the tools. 
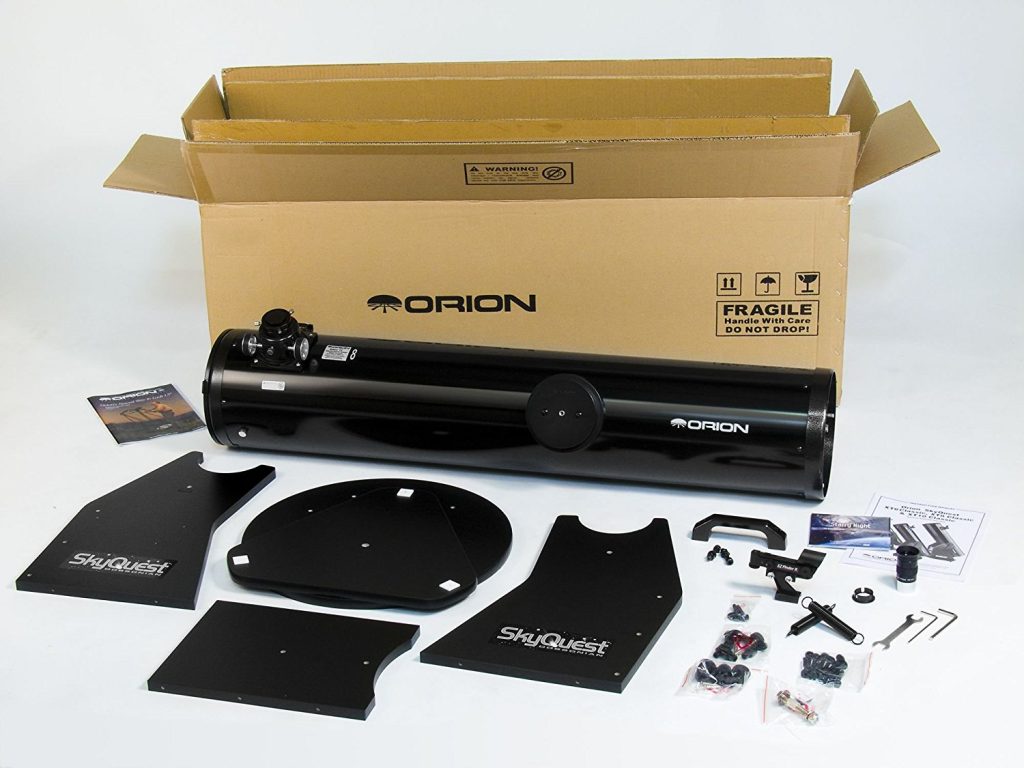
Orion XT8 unboxed

Once the base was assembled, you can just set the tube in the base and attach the side springs which put tension on the setup so the scope stays where you put it. Other telescopes I have used have adjustable tension while this one does not, but I fail to think of a scenario that a typical beginner would get into where that would be a problem. In fact, the only time I have used my tensioners on my Zhumell Dob is when I was doing something the telescope was never designed to do in the first place so I am not going to penalize the Orion XT8 for not having it.

About the only thing left is to slide the finder into the slot for it and tighten it down, then grab the eyepiece and start looking around.

Initial thoughts on moving the scope around are that it is pretty smooth in both altitude and azimuth movements. Years later, it is still remarkably smooth. As smooth as the more expensive scopes that use high end ball bearings for everything? Well no, but for much less expensive scope it is more than smooth enough and seems to keep that smoothness over the years. Using the teflon (I am assuming) pads on the altitude might actually be a really good thing as bearings can wear out and possibly corrode, the pads probably will not.

One of the down sides to any Dobsonian telescope, including this Orion XT8, is the cool down time. This is the time it takes for the telescope mirrors to adjust to the temperature outside. Typically you take the telescope from an air conditioned inside to an outside viewing location and the temperature can vary between the two locations by up to forty degrees. This temperature variance causes terrible viewing as the mirrors cool down (or warm up). Once the mirrors have equalized, the viewing is exceptional. Although not included with the scope, Orion does have a cooling fan that attaches to the back of the Orion XT8 to help it cool down faster.

Although I much prefer dual speed crayford focusers in my telescopes, the single speed rack and pinion in my Orion XT8 is pretty nice, and very functional. The newer single speed crayford in the new version of the Orion XT8 I am sure is an excellent focuser. Users I have talked to say it is very fast and smooth and a real improvement over the rack and pinion design.
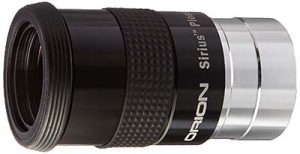
25mm Plossl eyepiece that comes with the Orion XT8

The 25mm eyepiece provided with the scope is a solid eyepiece for a beginner and provides excellent views of the moon, Andromeda galaxy, Orion nebula, and a host of other popular beginner targets. Unfortunately this one eyepiece choice can leave someone a little lacking so I would suggest you get an Orion moon filter and an Orion 12.5mm Sirius Plossl eyepiece to round things out.

Orion gives you a coupon for a download of some astronomy software included with the Orion XT8. I am not a fan. You can get Stellarium for free off the internet but really, who has a computer out next to their telescope unless they are doing astrophotography? Better options include Orion’s own Deepmap 600 which is awesome in the field, a nice Planisphere (be sure to select the right one for your location!) or any number of excellent phone/tablet apps.

If you wanted something a little nicer you could always go with Orion’s XT8 Plus. When looking at the orion xt8 vs xt8 plus, the plus includes adjustable tension, secondary mirror thumbscrews adjusters, two eyepieces, a 2x barlow and a dual speed crayford focuser for just $100 more:

Orion XT8 PLUS Dobsonian Reflector Telescope

Orion SkyQuest XT8 PLUS Dobsonian Reflector Telescope

Whichever Orion XT8 you decide on, you will have a telescope that should last for many years and provide excellent views.

I hope you enjoyed my little review of the Orion XT8 Dobsonian telescope!


Share this post! Facebooktwitterredditpinterestlinkedintumblrmail

You don’t have room to carry a telescope?

One of the concerns I hear from potential astronomers is that they have to travel to a dark site to do any serious observations or astrophotography and they just don’t think they can haul that much equipment. Sometimes it is a matter of driving a small vehicle, sometimes a matter of weight they have to carry. Either way I can usually talk to them a little and help dispel their concerns.

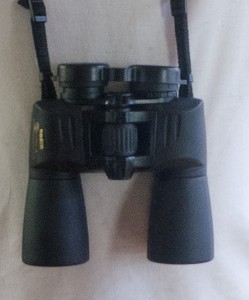
Lets start by saying you can have a lot of fun with nothing more than binoculars which can be worn on a strap around your neck. Whether walking, riding a bicycle, a motorcycle or a car, there is no excuse for not participating with binoculars. Often I have two pair of binoculars with me when I go out for a night. They are too easy to just throw into the back of the car or in the backpack. Many astronomy clubs even have Messier events where observers attempt to view as many Messier objects as possible in one evening with only binoculars. Even for seasoned astronomers this can be a really fun event and is often combined with cookouts or outreach programs.

binos

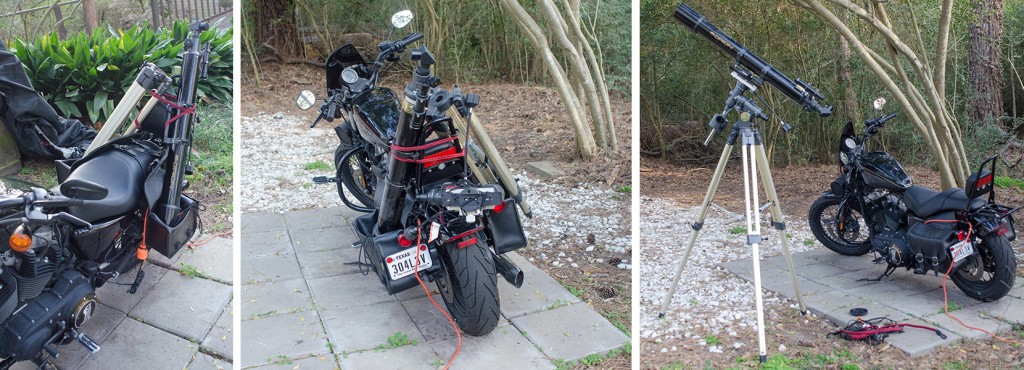
In many countries motorcycles are an extremely popular method of transportation for the majority of people, and indeed in the US they are fairly popular with college aged people for their great gas mileage and affordability. Unfortunately there is no way to do any astronomy beyond binoculars when you only have a motorcycle, right? Wrong. Assuming you are not pulling a trailer with your motorcycle (which would allow you to carry a full astrophotography kit without a problem) you still have room for much more than just a pair of binoculars. In fact, here are two options I can carry on my motorcycle should I want to take it for a night observing.

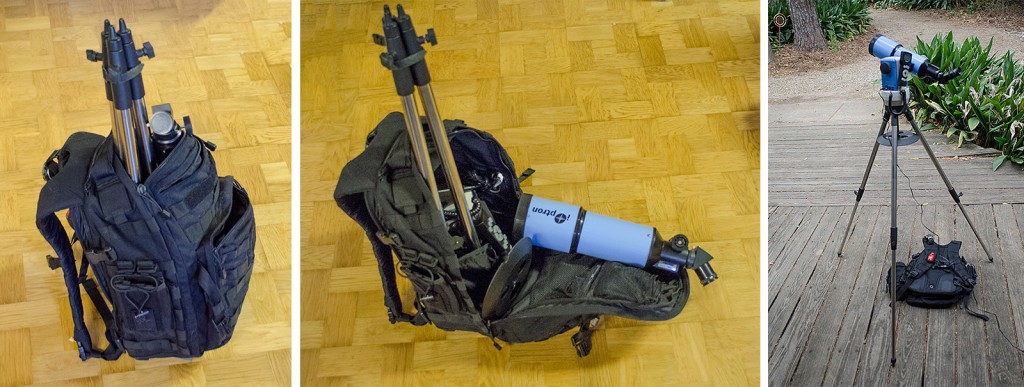
backpack

First is an iOptron SmartStar E R80 setup which was designed to be portable and is even featured in my Getting Started: Budget Astrophotography book. Included is the tripod, go-to mount (and they have a GPS version as well), all electronics running off battery power, camera, several eyepieces and remote shutter release. This entire kit fits without issue and will easily go on just about any motorcycle or even a bicycle as it mostly fits into a medium sized backpack.

bikes

Next is something a little bigger, an Orion 90mm refractor, and an older version is featured in my book Getting Started: Using an Equatorial Telescope Mount. While this simple EQ mounted telescope and has no computer or electronics at all, it is still a very nice little visual setup to grab and go on an unexpectedly clear night when you just want to run out for a couple hours.

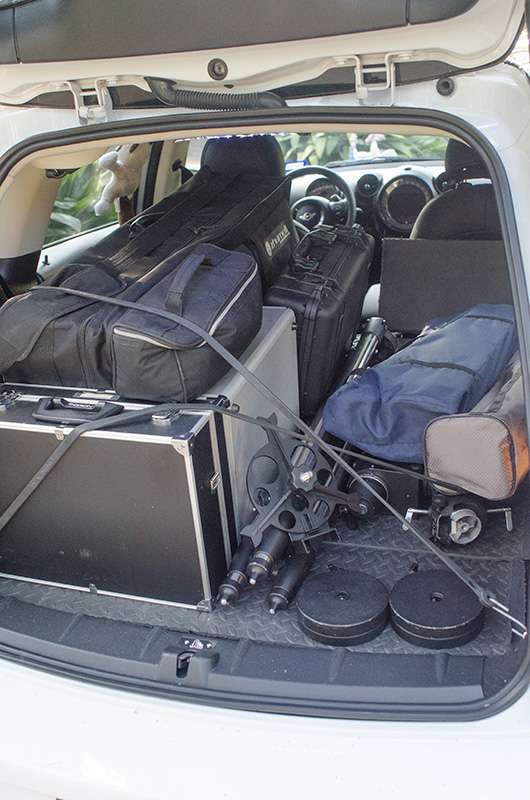
So what about small cars? I drive a MINI Cooper S Countryman which although not the smallest out there I believe qualifies as a “small car”. I regularly carry my full astrophotography rig, table, two laptops, fan (for summer), blankets (for winter), chair, cooler, and on occasion a second telescope or AP setup.

room6In the above image, everything but my laptop and cooler which are in the front seat are in the back. There is still plenty of room for a complete second observing telescope/mount combination.

Family cars can be used as well without sacrificing the back seat. My 8″ dobsonian with all my eyepieces, accessories, chair, table, computer, cooler and much more all fit neatly in the trunk of my Wife’s Buick. We could still carry five full sized adults.

There certainly are limitations but you should never think that you can not do any real astronomy or astrophotography because of what you drive, ride or even if you walk.


Share this post! Facebooktwitterredditpinterestlinkedintumblrmail

Zhumell Z8 Dobsonian Review, not all dobs are equal

After purchasing my new Zhumell Z8 Dobsonian I thought I would share some information on it.

In doing research for my upcoming book “Getting Started: Budget Astrophotography” I was in need of an 8″ Dobsonian telescope. Lots of people have this type of telescope so it is absolutely one that needed to be discussed in the book. Like most people, I wanted the best scope for the best deal I could get and I had heard a lot about Zhumell Dobsonian telescopes, that led me to Hayneedle.

If you are curious about the design of the Dobsonian, read more at Wikipedia.

Zhumell Z8 Dobsonian Most people who know me know that I typically have a brand preference that I stick with. They also know that I will only stick with that brand if the price, performance and quality are close to the competition. This meant that I wound up comparing the Orion XT8 vs Zhumell Z8. In this case they weren’t really close so I went with the Zhumell Z8 Dobsonian telescope which is the house brand for Hayneedle. To start with the price between the Zhumell and its competition is very close, not really enough to worry about. The Zhumell Z8 Dobsonian comes with both a 9mm 1.25″ eyepiece and a 30mm 2″ eyepiece whereas most competitors including the Orion only ship a 25mm 1.25″ eyepiece or something close. In addition they ship a screw on moon filter and laser collimator, the Orion ships with a collimation cap and cheap reflex finder.

Zhumell accessories While I prefer a red dot finder the 8x50mm right angle finderscope on the Zhumell Z8 Dobsonian is a very nice finder and typically considered an upgrade to a simple red dot. Another huge win for the Zhumell is the dual speed crayford focuser that is just as smooth as silk.

Zhumell focuser Finally, my favorite feature is that the Zhumell Z8 Dobsonian has adjustable pivot points so you can balance the scope (Orion has nothing like this), and then adjustable tensioners on each side (not flimsy little springs or friction tape) so you completely control balance and resistance, nice.

Zhumell pivot points

To make this telescope perfect they should offer a kit that swaps the 8x50mm finderscope with a deluxe red dot, and maybe throw in a 2x barlow which would effectively give you the equivalent of 4.5mm (pretty much unusable), 9mm, 15mm and 30mm eyepieces. Other than that little pickyness, I highly recommend this telescope and consider it the best Dobsonian telescope in this size and price range. If you are in the market for a Dobsonian, this should be on your short list. You can sometimes pick up the Zhumell Z8 Dobsonian used HERE or head on over to telescopes.com to get a new one.


Share this post! Facebooktwitterredditpinterestlinkedintumblrmail

iOptron SmartStar E R80 budget goto

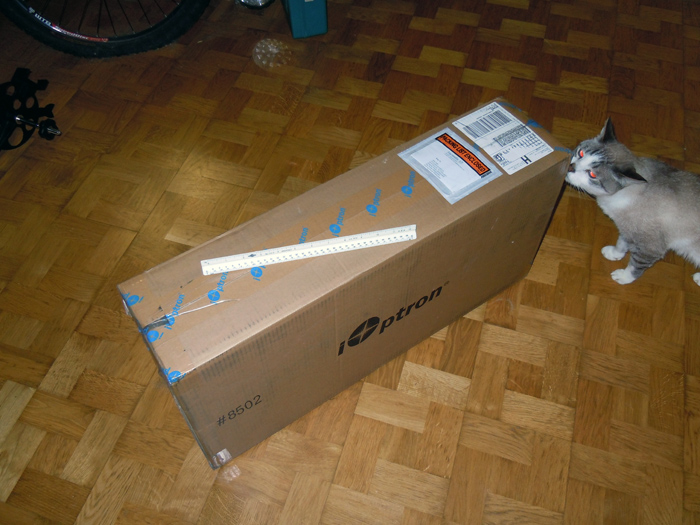
Last month I purchased the iOptron SmartStar E R80 available from Amazon as part of my work on a new book I am working on and needed a low budget solution for AP and this iOptron telescope seemed to fit the bill. You can’t really write about budget AP if you are using thousands of dollars worth of mounts and scopes to get the images, now can you? So after looking around I decided on this iOptron SmartStar for a lot of reasons, not the least of which was the fact that it uses a side mount so the camera presents less of an interference problem with the mount. I thought this would be the perfect cheap astrophotography telescope. It arrived in one small box, here it is with a 12″ scale on top of the box to give you an idea of size, being inspected by my postal inspector:

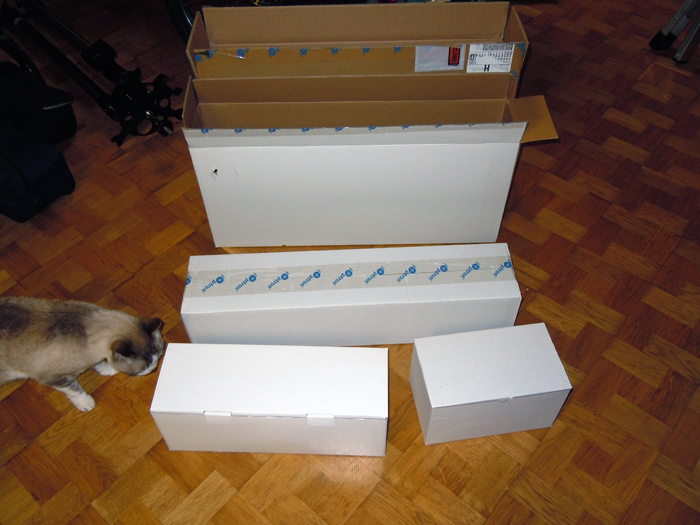
How it arrived Inside that box is a lot of smaller boxes, again requiring inspection:

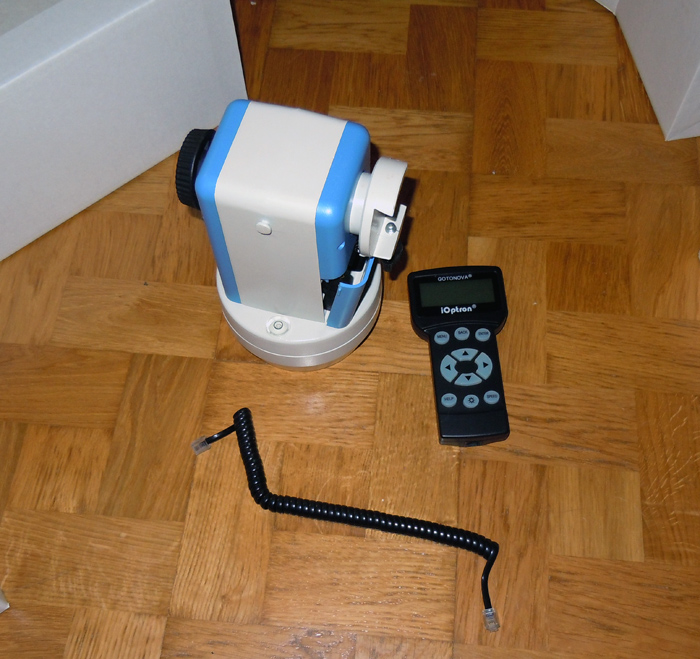
Boxes within boxes First out was the mount head, hand controller and cable:

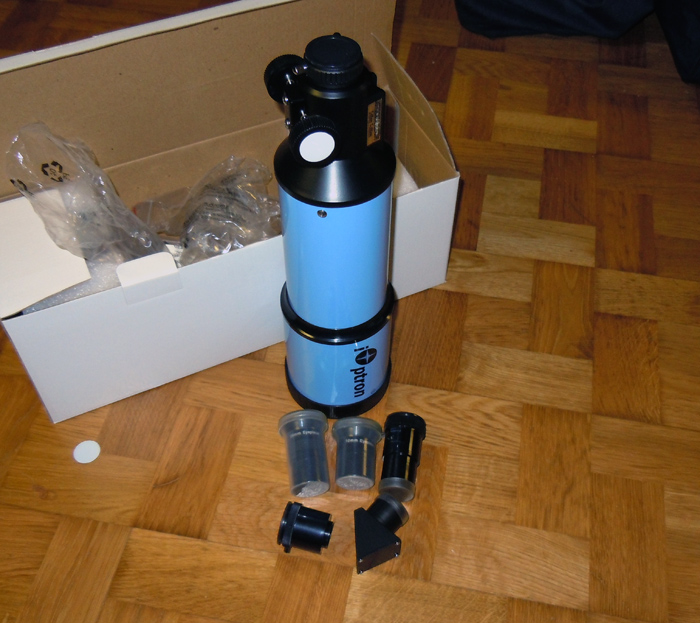
Mount parts Next was the scope and accessories:

Unboxing I wasn’t expecting much from this iOptron SmartStar, and as I expected, the bulk of it felt like cheap plastic. The scope, the focuser, the mount, all pretty much plastic. The build quality was better than I expected for a budget telescope in the $250 range, but was still cheap. What I did not expect however, was how well the SmartStar R80 Computerized Telescope performed…

iOptron SmartStar E R80 Once hooked up and pointed roughly south (odd I thought since all the other scopes I have need to point north) I told it where to go, it went, more or less to the right area of the sky but definitely not on target. Once you sync it to a couple of stars however it is remarkably accurate. In fact, using a low power eyepiece you are virtually assured to get any target in your field of view on the first attempt.

This isn’t impressive on my SkyView Pro or Sirius setups, in fact, “in the field of view” is not acceptable for them, they need to be dead center of the field of view. But when you consider this scope and mount combination cost about one third of what my cheapest goto EQ mount alone cost, it is impressive indeed.

The next impressive thing is the views. How good can a 80mm budget telescope with a cheap plastic tube and a cheap plastic diagonal and a cheap mostly plastic eyepiece be? Better than I expected! In the same league as my other scopes? Well, no, of course not, but far better than the price tag would lead you to believe. In fact, one of the things I thought when I bought this setup was I could swap out the scope for a nice ED doublet, a dielectric diagonal and a real EP and use it as a nice little grab and go scope. While I still may do that I certainly am in no rush as the views of M42, the moon, and Jupiter were quite reasonable.

The one place I was not impressed was the tripod. Stability was not this thing’s middle name, not even its great grandfather’s middle name. Light weight, sure. Easy to transport and set up, yup. Stable, not even a little. The good news is that if ever there was a cheap scope and mount that was worth spending a little money on finding a slightly heavier tripod, this is it.

The basic setup of this iOptron SmartStar comes with the mount, tripod, hand controller, AC adapter (can also run off batteries), 80mm scope, 45 degree diagonal, 25mm and 10mm eyepieces. So over all would I recommend this setup? Absolutely. In fact, if anyone asks me for a suggestion on what scope to get someone showing a faint interest in astronomy without breaking the bank, instead of the normal 8″ Dob a lot of people insist on suggesting, this will be my scope of choice.

Light weight, easy to use, reasonable views, and a nice selection of targets you can just press a button and slew to without doing a lot of star hopping. This should be a real winner for newcomers to the hobby who want a budget telescope and if I had one of these back in the day instead of that awful reflector I started with, I would have never given up astronomy for all those years.


All ratings considering price:

Views: ****

Stability: **

Ease of use: ****

Accessories: ****

Overall: ****

If you would like purchase an iOptron SmartStar E R80 for yourself, please use my link: iOptron SmartStar to help offset the cost of maintaining this website.


Share this post! Facebooktwitterredditpinterestlinkedintumblrmail

Explore Scientific AR127 review

I recently bought an Explore Scientific AR127 (sometimes called the ES127 or just ES AR127) and thought I would add my experiences to the other ES AR127 reviews.

Back in October I bought an Orion 90mm f/11 scope to do visual. I didn’t want to spend much because I really don’t do much visual and didn’t have much of a desire to. Recently I have been wanting something a little more, a little larger. Not too large mind you because it won’t fit in the car with all the AP rig already in there (and I drive a full size car, Buick Lucerne). I looked around for something in the 120-130mm range, any larger and it would be too big a pain in the rear to use and I would have to have a new mount for sure. Too small and there won’t be much of an improvement over what I already have. I also really hate the finderscope on the old Orion but it used a weird mount so you can’t just slap a different finder in there. I would also like to use all the 2″ equipment I already have for my APO since the APO will be imaging while I use this. I wanted something much higher end than the standard starter 120mm scopes offered by Orion and Celestron, but where to look?

All the reviews pointed to Explore Scientific refractors, specifically the Explore Scientific AR127, as the finest non-ED/APO out there right now even discounting issues with their focusers. I chatted and emailed them and got really depressed. The chat was about the finderscope they include, an 8×50 finder with a proprietary mount, and the possibility of buying just an OTA with rings as I have no need for the finder or diagonal in their “kit”.

The employee in the chat session, Langlee, informed me that they had no alternative to the finder on the AR127 but I could contact one of their distributors, Camera Concepts, as they carried many different types of adapters.

After a quick call to Camera Concepts I was relayed a message from the owner and told to use double sided tape as they had no adapters for the Explore Scientific AR127. Yes, that is why I am looking to get a high end achro scope, so I can mount my accessories with double sided tape. Langlee also said they could probably get me just the OTA but he had to talk to accounting and would get back to me. So on to email which was the response about buying just the OTA and rings, which was from David. After many volleys back and forth the general gist of the conversation was that no, they would not sell me anything but their kit, and I should be happy to have it. I also found out that they have an entire machine shop dedicated to things like making finderscope mounts fit for customers (seems Langlee had no idea that part of the company even existed). So would they take the existing finderscope, mount and diagonal in trade for putting a $15 aftermarket vixen style shoe on the scope before they shipped it to me? Absolutely not because it is “Hard to pay our machinist with parts.  He prefers cash for some reason.” Yes, that is exactly what David told a prospective customer.

So I have to assume that even they don’t believe their finderscope and diagonal is worth $15. But enough of that, I want the Explore Scientific AR127 for the optics which are supposedly first rate, and indeed David challenged me to find another doublet with equal optics which he claims are 1/4 wave or less PV. This was right before David suggested velcro instead of double sided tape for my finder, LOL! So you may ask, if I was already this unhappy with their customer service, why would I buy their scope? Simple, I could not find anyone with a scope that had comparable optics in a comparable price range, anywhere, or I certainly would have bought elsewhere. Because of their terrible customer service, I decided to buy my AR127 from a different vendor, such as from Amazon HERE instead of direct from ES to add a safety net into the equation so I did not have to deal with ES at all.

Explore Scientific AR127 So here is the Explore Scientific AR127 mounted and ready for the night’s observing. How did she do?

Optics: First rate for an achro. Of course not even in the same league as my Orion APO, but then again it is larger and a fraction of the price. Views of stars shows some CA around them, but surprisingly enough Saturn and the Moon show only very minor CA. In fact, the views of the moon were amazing. This scope takes power like nobody! I even went to my 5mm Stratus and it held up well although it preferred the 8mm. Of course this is with my Orion 2″ diagonal. Note the three sets of collimation screws in the image below:

Explore Scientific AR127 objective  

Overall build quality of the Explore Scientific AR127: The tube is nice, paint is nice, rails and rings are very nice. The handle at the top is a really nice touch although it would be pretty useless to mount anything but since I have no need to mount anything I like it. Dew shield is not retractable like my Orion so the scope is pretty long.

Focuser: Although it performed fairly well I see why people don’t like it. It feels cheap, the lock works….kinda, and the tensioner works…kinda, there is no scale printed on it, and it does not rotate. The two knobs for lock and tension are so close together and so close to the same size, I am honestly not sure which I was turning at any given time. I see a new GSO focuser in this scope’s future. I wish it had a focuser like the one on my Orion.

Explore Scientific AR127 focuser knobs Documentation: You mean the packing slip? You must because that was all that was in the box.

Lens cap: Large, with a molded in handle, but plastic and not screw in. I much prefer the aluminum screw in of my Orion, but again, the Orion was a much more expensive scope.

Overall: I think I will keep the Explore Scientific AR127 because the optics are really good. I have a new finder shoe and scope on the way from Orion and am looking at focusers right now. With those two replacements this will be an excellent scope. As it stands I feel I overpaid ($649 with free shipping) for what I got, but maybe the sale of the diagonal and finder on the bay will help bring the cost down a little.

On a different note I mounted this scope on my Orion Skyview Deluxe mount for now which handled the load very well. I did have to make one modification which was a dovetail adapter from ScopeStuff.com as shown here:

Right view of the ScopeStuff adapter and here:

Left view of the ScopeStuff adapter  

I can’t say enough good about this dovetail adapter and the service from ScopeStuff. They shipped so fast I thought they made a mistake telling me when it shipped (same day I ordered it, well after 5pm their time) and it arrived two days later perfectly. The only downside was I had to buy longer bolts and more washers since I was running an aftermarket mounting plate but that was totally my problem and not theirs. If I had been using the factory plate what they sent would have worked fine. If you decide to get your own Explore Scientific AR127 (or ES127, whichever you want to call it) please use THIS LINK to help offset the costs of running this site.

I hope you enjoyed my little review of my Explore Scientific AR127!


Share this post! Facebooktwitterredditpinterestlinkedintumblrmail
Orion Skyview Deluxe 90mm f/11 refractor

After purchasing my Orion Skyview Deluxe I thought I would share my thoughts on it.

Imaging can take many hours without touching anything. You just sit there. Sometimes I read, sometimes I watch TV, sometimes I browse the internet. Why not look around at the sky? So I found an Orion Skyview Deluxe on the bay that I liked, first because it was a refractor and I really like my refractors, second because it was kind of a classic from the 1980s or 1990s, and thrid because it was Orion and I really like my Orion stuff. I managed to get it for what I though was a reasonable price, just under what a new Orion Astroview 90mm would have cost and this one had a better mount and polar scope to boot. When it arrived there was a problem, they had not packed it well and the top plate where the scope mounts was broken:

Broken mount adapter  

So I emailed Orion, I could hear the laughter from here, no, there is no replacement part for an Orion Skyview Deluxe. I tried Astromart, dead silence. I tried a local welding shop, they laughed saying it was cheap pot metal and there was no way to repair it. They did however suggest a machine shop. After talking to Pat at ELM Machine in Oakhurst it seemed he was confident he could make a new one better than the old, and here is what he came up with:

New custom adapter   This isn’t “better” than the original, this is WAY WAY WAY better than the original! Excellent work Pat! Now my scope is in service and I will have more to do than read or watch TV while imaging for more than eight hours a night.

Orion Skyview Deluxe with new adapter I like this scope so well that even when it is not in use it is assembled and sitting in my living room where I can swing the scope around to look out the back window. I can also carry it through the sliding glass door and set it on the back upstairs deck. With a low power eyepiece the Orion Skyview Deluxe is a wonderful scope for watching the buzzards sitting in the tops of trees.


Share this post! Facebooktwitterredditpinterestlinkedintumblrmail