The Celestron Powerseeker 70AZ is frequently a top recommendation when people ask me what telescope they should get their kids as a first telescope. Let’s find out why.
Their First Telescope
That first telescope is much more important that most parents realize as it can help foster an interest in astronomy and science in general, or completely destroy the child’s interest. You probably wonder how that could be, and that is an excellent question.
Let’s look at this a different way; assume your kid wanted to play little league baseball. You went out and bought them a glove and a ball but when it came to the bat you bought one of those foam bats you can hit people with and not hurt anyone. Every time they tried to hit a baseball, the bat would simply flex and never actually make the baseball do anything. Since they never got a hit, always struck out, they would quickly loose interest and give up the game.
Who wants to play a game where you never even have a chance of winning no matter how hard you practice and try? No one, that’s who.
So now let’s switch to astronomy; you buy them a great book on astronomy and a cool map showing where some amazing objects are, then you give them a telescope that even when used by a professional could not identify a car across a football field much less the planet Jupiter in the night sky. It wobbles, it’s blurry, and it is extremely hard to navigate. What do you think their reaction would be?
The good news is that you don’t have to spend a fortune to get a reasonable telescope that will keep them interested, and this telescope is one of those.
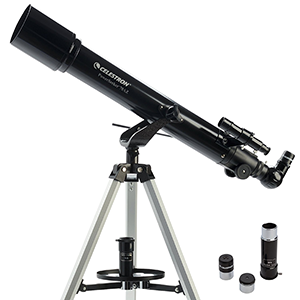
The Celestron Powerseeker 70AZ
The Celestron Powerseeker 70AZ telescope is a refractor telescope with a 70mm aperture on an alt/az mount and is pretty well made for it’s price of around $80. A large part of the telescope and mount are actually metal and have more stability than you might expect from a telescope of this size.
From the minute you unbox the Celestron Powerseeker 70AZ you can tell it is a much better telescope than those cheap department store models. Setup is pretty easy and straight forward consisting of a few thumb screws and requiring no tools.
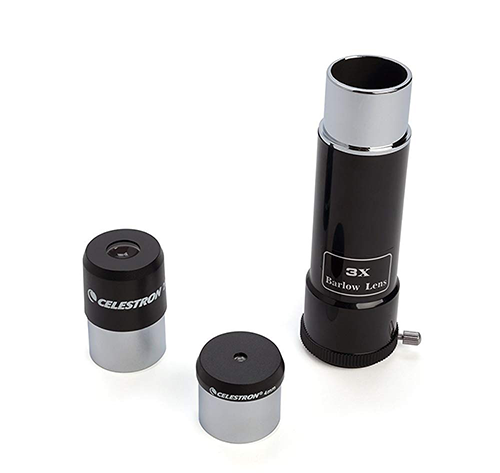
The current model of the Celestron Powerseeker 70AZ comes with an adequate 5x24mm finder scope (just barely), a 20mm eyepiece, a 4mm eyepiece (useless) and a 3x barlow (also useless).
You are probably wondering why I like the Celestron Powerseeker 70AZ when I use terms like barely adequate and useless when I describe the accessories. Good question.
Virtually every manufacturer of lower end telescopes these days throws in some junk so that their “specifications” are better than the competitor’s, and the Celestron Powerseeker 70AZ is no exception. It is simply a sales tactic and it does not apply to just astronomy equipment. The last time I bought a toaster oven it came with racks and trays I have never had a use for, but it sure looked cool on the box that it came with all this extra stuff. Same thing here.
I don’t really penalize the Celestron Powerseeker 70AZ for doing what everyone else does, particularly since the quality of the scope is high enough for the price that I could simply throw away the 4mm eyepiece and barlow.
In comparison to other telescopes like the Celestron Powerseeker 80eq, the Celestron Powerseeker 70AZ has a longer focal length making it a better choice for close ups of the moon and viewing planets.
Comparing the Celestron Powerseeker 70AZ to something like a Celestron Powerseeker 127eq reflector telescope it does not require near the cool down time (the 127eq has two mirrors which need to acclimate to the outside temperature before use or extremely blurry images could result) and requires no maintenance or adjustments such as the collimation required by the 127eq. The 127eq also requires learning how to use an equatorial telescope mount whereas the alt/az mount on the 70AZ is pretty much intuitive even to children with no experience. This makes the Celestron Powerseeker 70AZ a better choice for kids and first time telescope users.
Using the scope
Where the Celestron Powerseeker 70AZ shines is actually using the telescope. With the alt/az mount there is nothing to learn, point it at something and look through the eyepiece, simple as that.
The optics in this little scope are surprisingly good. No, they are not as good as say a $350 Orion Astroview 90mm refractor, but then again they are close enough to ignore considering how much cheaper they are. Images of the moon are very impressive although I would really like to have a moon filter (stay away from Celestron’s own moon filter) to make viewing a little more comfortable.
Saturn and Jupiter are clearly identifiable and a joy to watch, as is the Orion nebula and Andromeda galaxy. From there it is a mixed bag with objects such as the Pleadies being easy to see and pretty spectacular, The Lagoon and Eagle nebulae are quite pleasing but require a bit more effort, while the Ring and Dumbbell nebulae are virtually impossible to get any enjoyment out of with the Celestron Powerseeker 70AZ beyond finding them.
To some extent this can be improved with a couple of better eyepieces but I personally would probably suggest moving to a nicer telescope such as the previously mentioned Orion Astroview 90mm refractor if you find you outgrow the Celestron Powerseeker 70AZ and still want more.
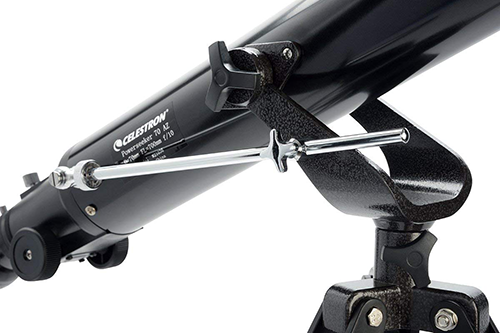
I was originally a little concerned about the plastic rack and pinion focuser but after using it a few times it has proven to be remarkably smooth and tight, allowing virtually no play but still being easy to use. I think that the light weight of the diagonal and eyepiece along with the relatively small size of the telescope tube allows plastic to work well here whereas it would not in a larger telescope.
Speaking of the diagonal, the Celestron Powerseeker 70AZ comes with one made of plastic and a little unusual. Where most diagonals are angled the one included with the Celestron Powerseeker 70AZ is more of a ball shape with two tubes coming out. It also seems to be much more enclosed than a standard diagonal which should help keep dust, dirt and dew out of it over time.
I am not really a fan of the finder but it serves it’s purpose fairly well. Like all finders, be sure you set it up during the day using a far away object such as the top of a telephone pole, water tower antenna, etc. Once it is adjusted it is acceptable. Of course, no telescope in this price range has a good finder because that would take money away from making the actual telescope better and we do not want that. You can do without a finder, but a terrible quality main telescope will just make the whole thing a waste of money, and the Celestron Powerseeker 70AZ is certainly not a waste.
Final thoughts
You will be hard pressed to find a better first telescope for a beginning astronomer. I really like to recommend the Celestron Powerseeker 70AZ because it is inexpensive, light weight, breaks down and stores small, requires no maintenance and provides more than adequate views of the most popular objects in the night sky.
Share this post!