Observing the moon in daylight

Moon in daylight? You have seen it, I have seen it, it is broad daylight and there in the sky is the moon. If you stop and think about it you realize that the moon is up in the daytime just as much as it is at night, we just don’t tend to notice it. In my opinion this is a direct result of the fact that the moon has a much higher contrast at night since it is the only rock we see directly illuminated by the sun.

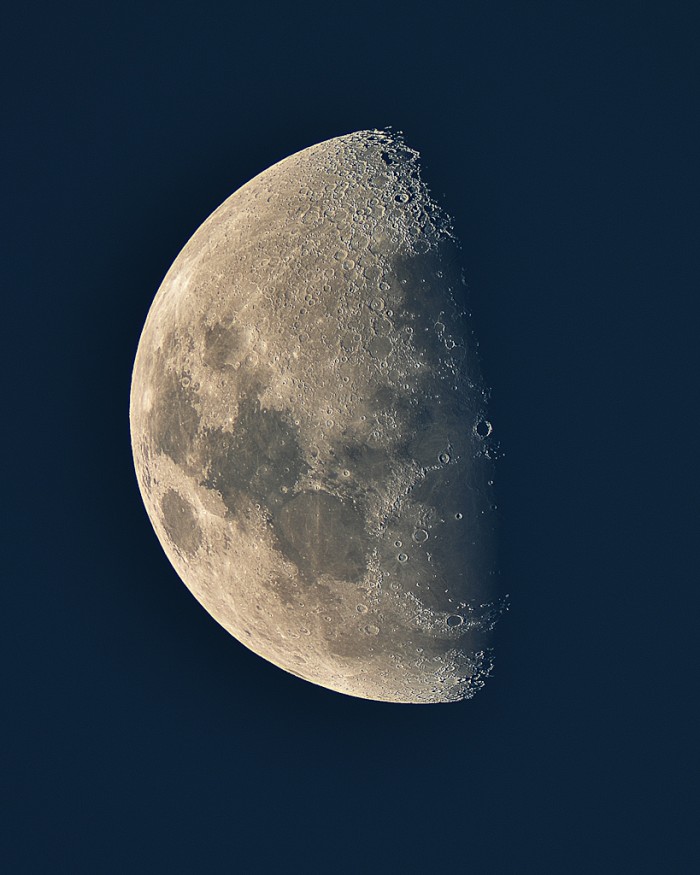
moon in daylight when imaged

The picture above was taken during the day on March 31st 2012. It is a stack of images run through registack to improve detail and sharpness. Yeah, it might be a little too sharp, but that’s OK with me.

One question I always get asked is if I shot that picture in the daylight, why is the sky black? Remember that the moon is very bright, even the moon in daylight is a light gray rock being lit by the sun. The atmosphere is lit by scattered light. In order to darken the moon so that it is not just a white blur you have to reduce the amount of light hitting your camera sensor. This reduction not only darkens the surface of the moon but the sky around it as well. If you look close you will see that the sky around the moon in the above image is not really completely black although it is very dark.

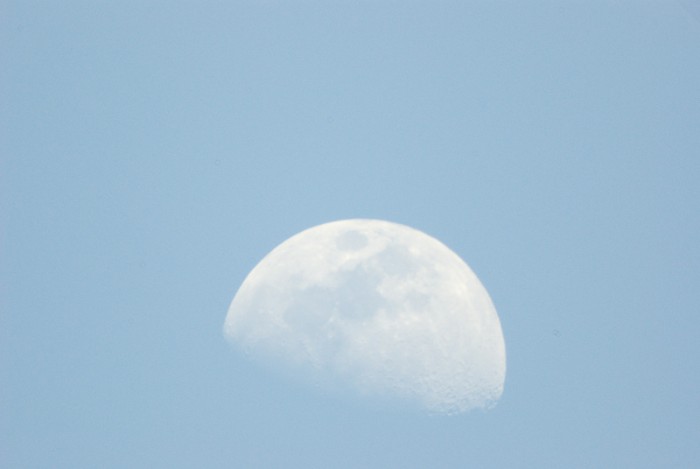
What the moon in daylight to our eyes

In this picture you can see the blue sky, but the moon is way too bright. This is why when you take an image and want to be able to see the surface details you need to darken the image.

What does this mean if you just want to observe the moon in daylight and not take pictures? Remember that moon filter or polarizing filter you use at night? Yup, use that in the day too. The amount of sunlight bouncing off the moon is the same whether it is also shining on you (daytime) or not (nighttime).

If you don’t have one or you want a really nice one there are a few options. First you can purchase neutral density filters which simply reduce the amount of light by a specific amount. The trick is that these reduce all colors of light equally making your view darker, but still correct. You can get both a Baader Planetarium Neutral Density 2″ ND 3.0and a Baader Planetarium Neutral Density Filter 1.25″ ND 3.0 which covers either 2″ or 1.25″ needs. Note the ND 3.0 specification as there are ND 0.9 and ND 0.6 versions as well. The 3.0 is the darkest of them and if you are going to bother I would get the darkest to start with.

You could also go with a variable polarizer which can provide a similar experience. It works by removing stray light that comes in a different angle and only allowing direct rays of light. These can make for sharper images by reducing glare and stray light but often do not cut light as much as the neutral density filters listed above. They also come in both sizes as well such as the Orion 5562 2-Inch Variable Polarizing Eyepiece Filter and the Orion 5560 1.25-Inch Variable Polarizing Filter.

I enjoy viewing the moon in daylight in winter as it is much warmer. Just remember that the seeing conditions are typically worse in the day than at night. This is minimized in the winter when you have the cold crisp air but the light scattering off of particles in the air still present an inferior image in daylight as compared to night.

moon in daylight over some trees

This still is a great way to do some outreach without having to have a group of kids and their parents tripping all over your equipment in the dark in the library parking lot. It is also a lot of fun to observe while waiting for it to get dark so you can observe or image other targets.

When you are ready to do some exploring you can use Sky & Telescope’s Field Map Of The Moon or the Sky & Telescope’s Mirror-Image Field Map of the Moon. I never go out without one of these in my astrophotography kit. These little laminated maps are fantastic for identifying features without getting so detailed as to be overwhelming.

Where do you look? Before the full moon, look in the afternoon. After the full moon, look in the morning. Regardless go outside and look up into the sky!


Share this post! Facebooktwitterredditpinterestlinkedintumblrmail

DIY light cylinder for taking flats; small, light, battery powered

My most popular DIY project which I think is now in at least two of my books is this one. Since so many people enjoy it I thought I would post it on the blog for everyone to use. Remember that this is primarily for inspiration and not really meant to be a recipe for one that will work with your scope.

Well since I have started really working on my post processing I have noticed the need to start shooting flats. The problem is, you must shoot flats without moving the camera, scope, focus, anything. This means they have to be shot on site, right before or right after shooting your lights.

There are a couple of problems with that. All the designs I have seen are large boxes, I don’t want to carry around a large box to the dark site and besides, something that large might disturb the dust bunnies and mess up the whole idea of flats. Next problem is if anyone else is there, flicking on a light could get me shot (this is Texas here, heh). So what do I do?

First thing I do is come up with a list of what it needs to be able to do, so here goes:

1) It must be easily portable, small and light. Anything heavy can mess up the scope’s setup.
2) It must be reasonably accurate. The light must be uniform in illumination.
3) It must be reasonably inexpensive, the EL panels I have been looking at run about $100, lets keep it under that.
4) It must be usable when other images are right next to me, no light leaks.
5) It must be servicable, meaning I can repair it, replace things, etc.

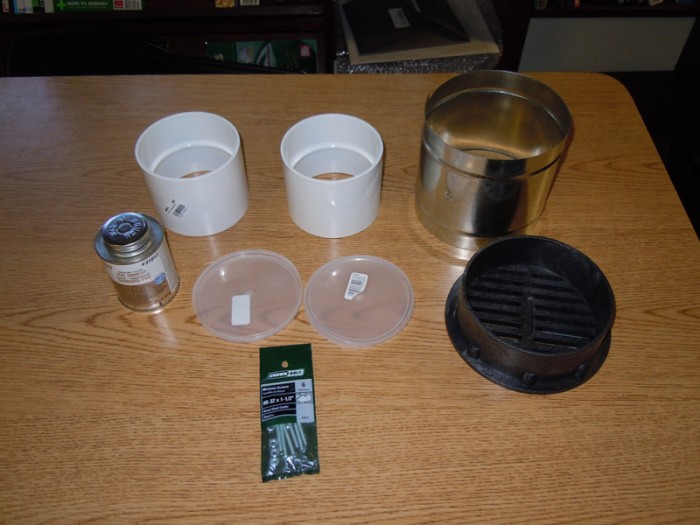
Off to Home Depot I go! I know they thought I was some terrorist getting bomb supplies, I walked up and down every isle grabbing weird items, putting others back, fitting things together that were completely unreleated. Boy did I get some weird looks! After about an hour I left with this:

diy01

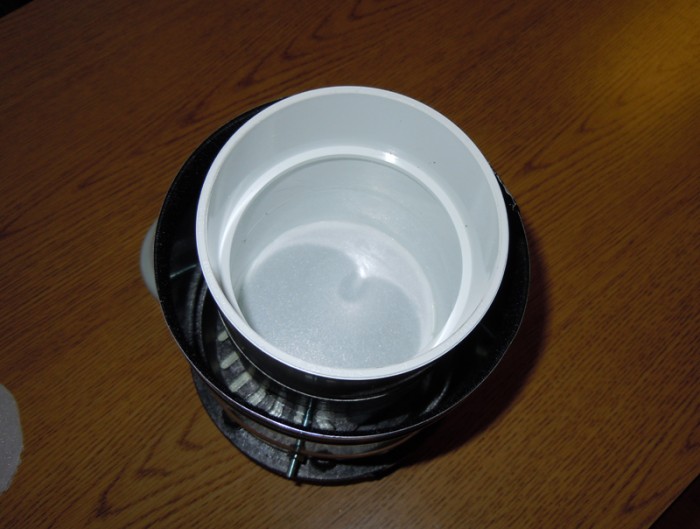
This was two 4″ PVC sewer pipe connectors, a 6″ flashing connector for I think a stove exhaust vent, a can of PVC glue, two translucent lids, a 6″ plastic floor drain grill, and a bag of bolts.

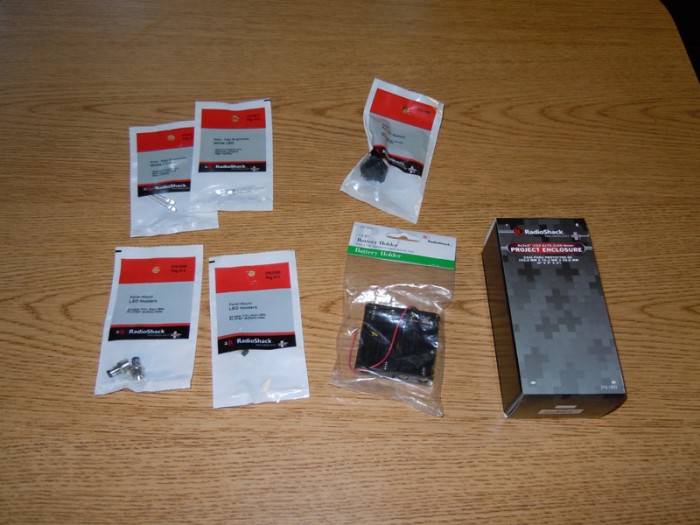
Next stop, Radio Shack!

diy02

Here I found 4 white 3v LEDs, 4 LED mounts, a rocker switch, a 4 AA battery holder, and a project box. Next stop, Wal-Mart!

diy03

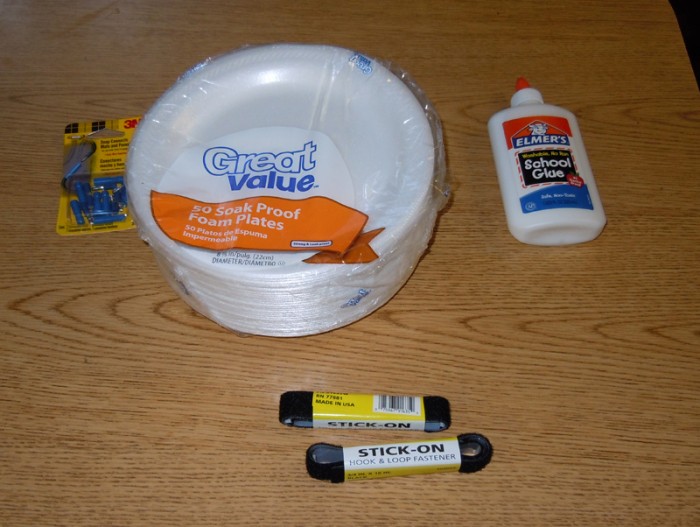
Left to right we have a box of male and female electrical connectors, some styrofoam plates, glue and some velcro.

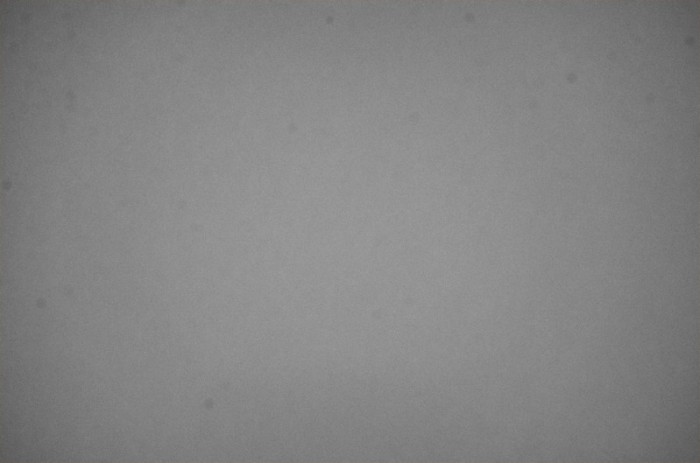
Now its time to start working on stuff. The first thing I needed was a Proof Of Concept. For this I put things together and mounted it on the scope with just some clear tape and used one of those battery powered lights you press down on the top to turn on. That gave me my first flat:

diy04

This clearly shows I need flats. This image has been stretched and desaturated, it was brown (used an incandescent bulb). Next was to test out the batteries and LEDs:

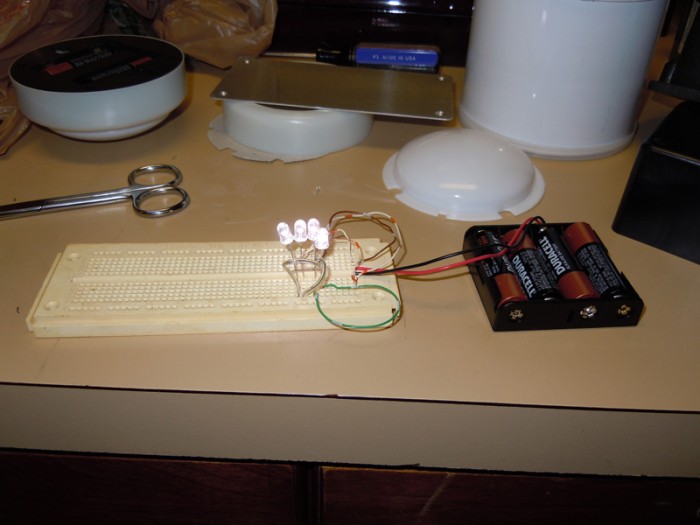
diy05

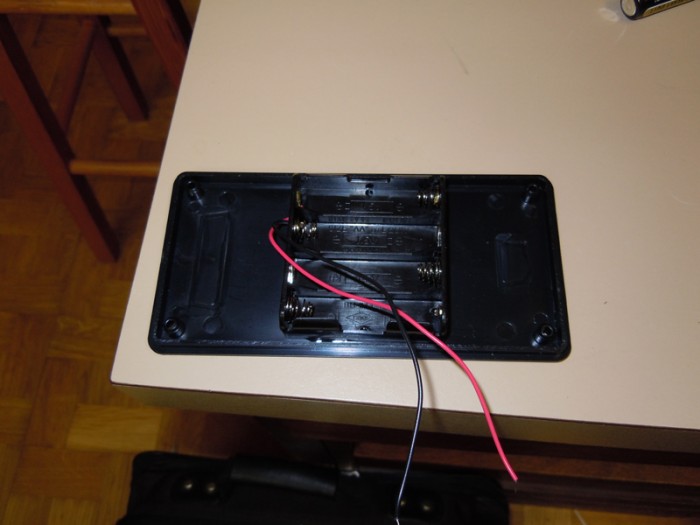
Good! Now I know I can get them all lit up. Lets mount the battery pack to the top of the project box with hot glue:

diy06

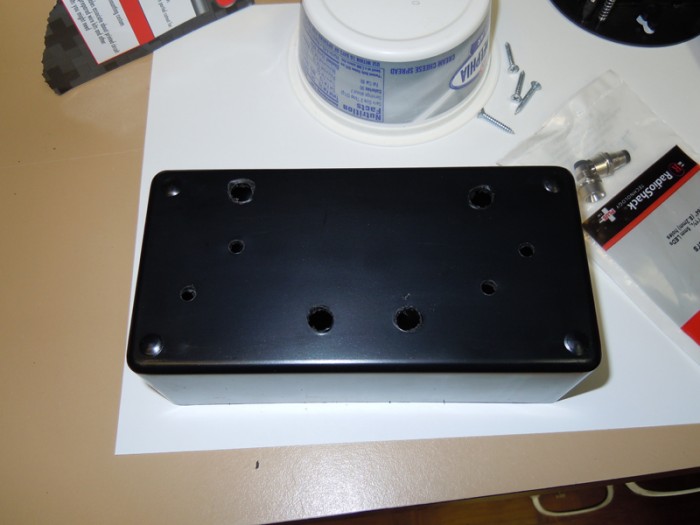
Now we drill holes in the project box, four large ones for the LED mounts and two (well, four now cause I goobered!) smaller ones to bolt the project box to the drain grill:

diy07

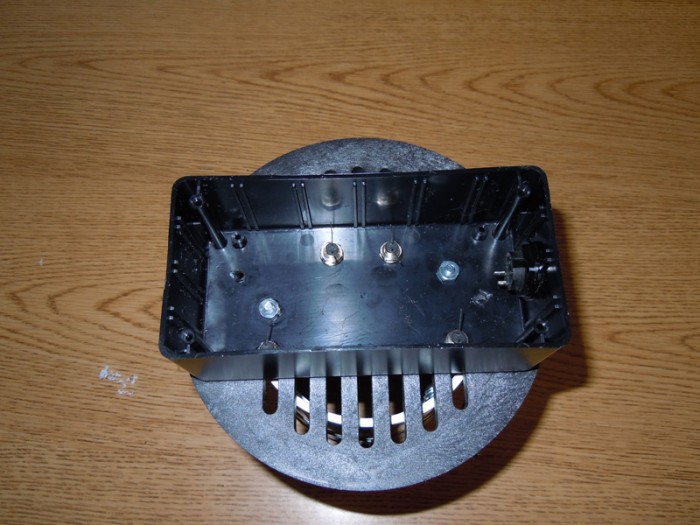
Now we bolt the box on the grate and install the LEDs:

diy08

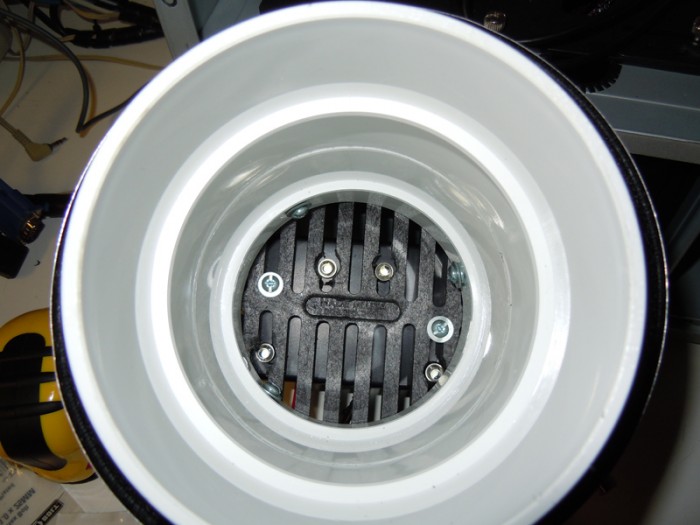
Now I open the package of velcro and take the fuzzy strip and run it around the inside of the 6″ metal connector, on the opposite end of where it will mount to the drain grill as this will protect the paint on the outside of the dew shield. Next we glue the two 4″ sewer pipe couplers together and mount them inside the 6″ metal connector:

diy09

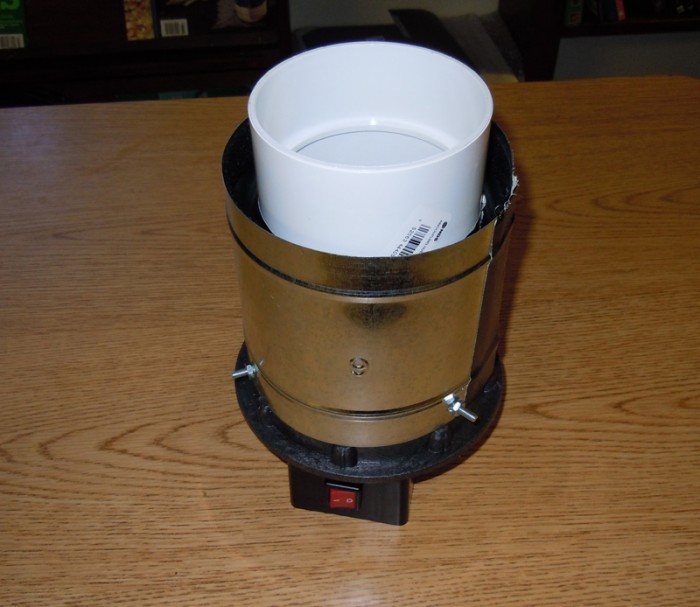
Here is the outside view:

diy10

After a little wiring, we cut the paper plates into two circles for difusers, here is the first one installed:

diy11

So I turn on the lights and there is a problem, the light is nowhere near even enough to take a flat:

diy12

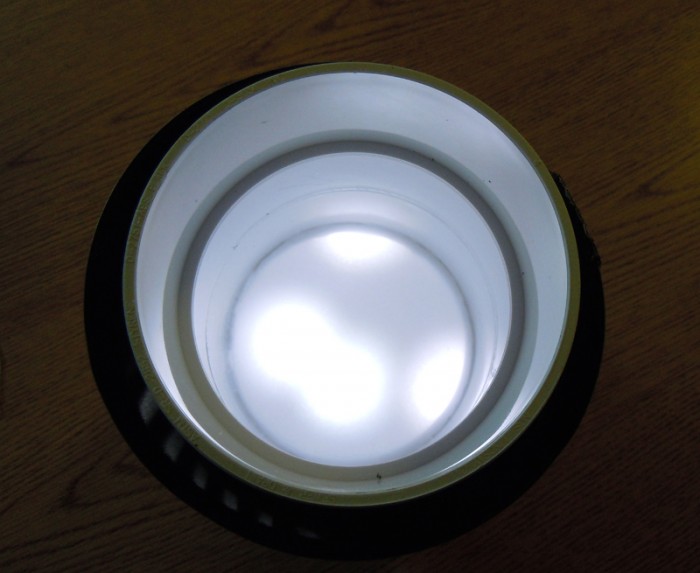
But I am not as stupid as I look! (or feel sometimes), I had actually planned on this and so I install the second difuser in it’s place four or so inches in front of the first diffuser and I get this:

perfect light for taking flats

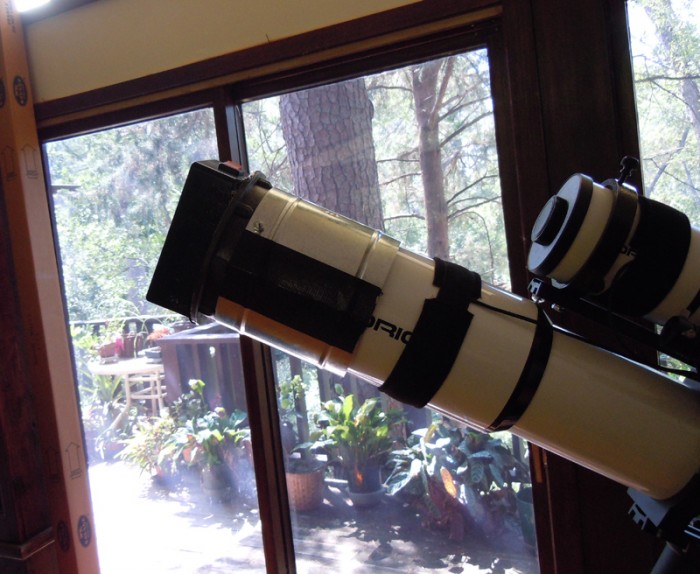
HA! Nice even illumination! Lets put it on the scope:

Set up to take flats

And take a flat to see how it works:

A nice looking flat

So a little information:

Size = 7.5″ diameter x 10″ tall/long
Weight = 2lbs 4oz with batteries
Cost = $60 buying everything except a little wire and solder
Time to construct = About 3 hours
Exposure for about 40% sat on histogram = ISO800 1/60th sec

Now since the light goes down the inside of the sewer pipe couplers, to leak out it would have to come back up the outside of the couplers, curve around the end of the scope, and go down the metal coupler on the outside. I don’t see much light doing that. After dark tonight I will give it another test and let you all know how it goes.

Hope you enjoyed!

Allan


Share this post! Facebooktwitterredditpinterestlinkedintumblrmail

Dark site etiquette

Dark site etiquette is an important part of astronomy to ensure that everyone enjoys their evening under the stars.

Dark site etiquette

When you are going out to an astronomy club dark site there are some guidelines you should follow to make it an enjoyable experience for everyone. Some of them probably seem like commons sense, and they are, to someone who understands what is going on. Unfortunately a lot of newcomers have no idea and this can cause friction. Help avoid the friction and stares by following a few simple astronomy etiquette guidelines.

Dark Site Etiquette Guidelines

  1. If you park anywhere near where people are observing make sure you arrive before dark and park your vehicle so that the headlights are pointed away from the observing field. This makes sure that when you leave before the serious observers or astrophotographers (and you will leave before them unless the sun has already risen) your headlights will do as little damage as possible.
  2. Get everything out of your vehicle as soon as you arrive. Stack it next to the vehicle if needed but whatever you do avoid opening the doors and causing the lights to come on repeatedly after dark. It is amazing how bright your interior lights are once everyone’s eyes have adapted to the dark. Many astronomers and astrophotographers go one step further with this dark site etiquette by removing or disabling their interior vehicle lights completely.
  3. Speaking of amazingly bright lights, do not use that super bright LED flashlight or the light on your phone to shine on the walkway so you can see where you are walking. Wait by your car until your eyes adjust to the darkness or bring a dim red astronomy light (available on Amazon or telescopes.com) to light your way. Even if your light is red, never shine it at anyone’s eyes or towards their equipment unless you ask first. Astrophotography is about photographing dim lights in the night sky, many of them red, so your red flashlight will ruin an hour long exposure and tend not not make you any friends. If you want a red flashlight used one specifically for astronomy as they are not stupid bright, one such as the Celestron 93588 Astro Night Vision Flashlight is an excellent choice and very affordable. Getting a dedicated red light for this will show everyone you really care about dark site etiquette.
  4. Never touch someone’s telescope without their express permission. They could be imaging and you are fumbling for an eyepiece to look through, destroying their image they have been exposing for the past hour. Or maybe they are in the process of aligning their telescope and your touching could move it off center messing up the computer’s calculations. Or they could be one of “those” people and they could get pretty hostile that you got handsy with their $1200 eyepiece on their $10,000 telescope (why did you bring it out here then goofus?).
  5. Watch where you step. Remember that many of these telescopes run off power cords, and those power cords run across the ground to outlets. Also watch for the legs of tripods. Tripping over either one can completely destroy an astrophotographer’s entire evening and cause a visual observer to waste thirty minutes or more setting everything back up.
  6. Use the restroom before you come out, some dark sites have no facilities. The bushes may be fine for you but you will be in mixed company and quite possibly have other people’s children running around.
  7. Laser pointers should only be used by experienced astronomers who frequent this dark site. Not only is it dangerous to point a pointer towards a person, it is more than bright enough to ruin someones image should the beam enter the area where they are shooting. In addition, it is not only bad astronomy behavior, but it is also a federal crime in the US and many other countries to point at an aircraft. Do you know where the local flight patterns are around this dark site? I know exactly where they are around mine because I constantly see planes there.
  8. If you borrow something, take it back immediately when you are finished. This is not only respectful but makes sure that the item is available should someone else want to borrow it.
  9. Lastly, if you take your children, please make sure they understand the expected astronomy behavior and keep a close eye on them. While most astronomy events welcome children and indeed are geared towards them in many cases, everyone wants both the child and the very expensive telescopes to survive the night undamaged.

When in doubt about astronomy behavior, ask around. Most astronomy gatherings have more experienced people who will be happy to lead you around and show you the appropriate dark site etiquette. Don’t let these guidelines scare you, we all make mistakes. As long as they see you are making an effort you will probably be excused for any little faux pas you may inadvertently commit.

I hope you enjoyed my article on dark site etiquette!


Share this post! Facebooktwitterredditpinterestlinkedintumblrmail

Difference between DSLR and CCD astrophotography

The difference between DSLR and CCD astrophotography cameras is pretty immense. Most people when searching for astrophotography equipment for beginners choose DSLR astrophotography because they either already have one or they are far cheaper to start with. When you go from DSLR astrophotography to a monochrome CCD you lose live view, but gain chip cooling. You lose color but gain sensitivity. You can lose pixels but gain resolution. Wait a minute! How can you gain resolution if you lose pixels? Easy, you no longer have the Bayer matrix turning every four pixels into one so your monochrome CCD in effect has four times the stated resolution. Yeah, I know it isn’t that cut and dried, but seeing the images from both it sure starts to ring true. Here is a DSLR astrophotography image of M8 taken with a 16.7MP Nikon D7000, 36 300sec lights and 25 darks:

M8 by DSLR I always thought this was a pretty good image for unmodified DSLR astrophotography, and it is.

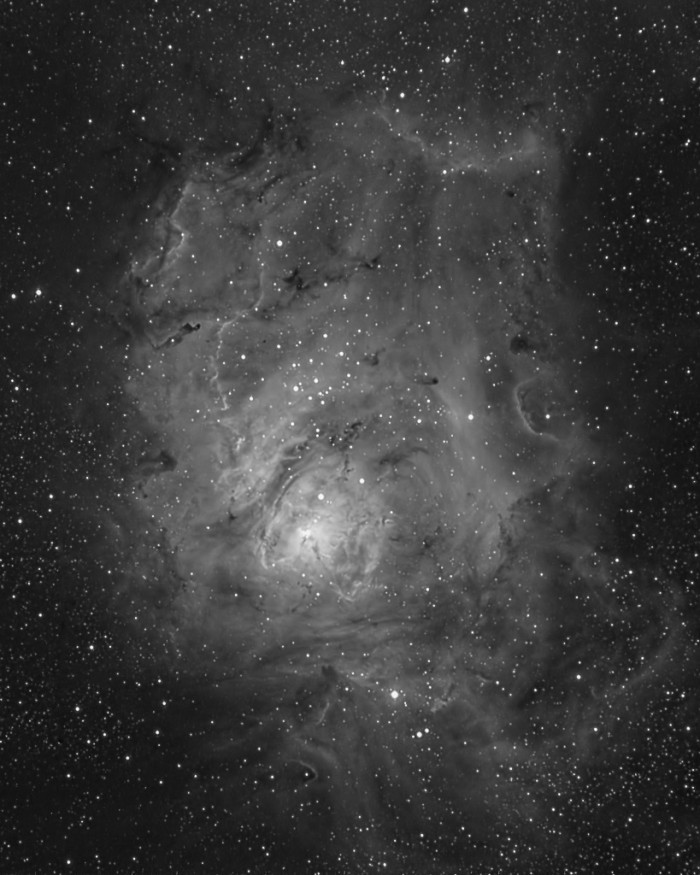
Once I decided to switch to CCD astrophotography I started looking for a camera trying to find the best CCD camera for astrophotography. Out of all the choices out there for astrophotography CCD cameras I picked an Atik 383L monochrome as it fit my needs and budget the best. Now here is the same target, same telescope, same mount, same capture software, same processing software, but with only an 8MP monochrome CCD shooting through a 6nm Hydrogen Alpha filter. That’s right, HALF the resolution:

M8 showing Difference between DSLR and CCD astrophotography Something else I forgot to mention, this is only 4 480sec exposures and 4 darks. Yep, one fifth of the total exposure time and about one sixth the number of darks. I don’t even know what to think except CCD astrophotography rocks. Why exactly was it I waited so long to go monochrome? I have no idea.

So now the thing that people always bring up when looking at monochrome CCD astrophotography is to shoot narrowband or RGB with filters on monochrome takes three times as long because you have to shoot through three different filters. True enough, but when I can get results like these with one fifth of the total exposure time, even if I have to shoot through three filters it still works out to less time exposing to get better images. I am still working on combining the Ha, OIII and S2 together to make a single color image and unfortunately the night I took this image I did not get enough usable OIII or S2.

Sure there are lots of things still to work out when switching from DSLR astrophotography to shooting CCD astrophotography but with a start like this it sure looks promising.

Stay tuned for the results of the first color combination coming soon!

I hope you enjoyed seeing the Difference between DSLR and CCD astrophotography!


Share this post! Facebooktwitterredditpinterestlinkedintumblrmail

Total Lunar Eclipse 04/15/14

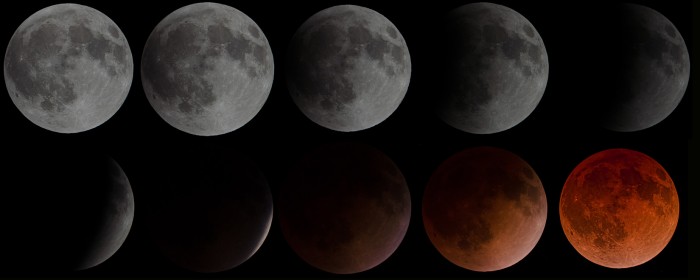
Last night I was able to not only view, but image a total lunar eclipse. There are a lot more lunar eclipses than there are solar for us to view. That doesn’t make them any less amazing. The weather cooperated wonderfully as a front blew through earlier in the day making sure that the air was extremely clear, although cold. As the clock passed 1:30am the shadow on the moon started to grow. At first it was so dim you really didn’t even notice it. It took me looking at the moon through binoculars and at the images from two different camera’s before I was sure it had started.

total lunar eclipse progression It is interesting to watch a total lunar eclipse and see the progression on camera. Your eyes are amazing devices and compensate for the moon dimming where the camera does not. You sort of notice that everything is getting dimmer around you but it doesn’t really sink in until you have to adjust the exposures on the camera to keep things looking even. The so called “blood moon” looks almost as bright as the full moon, but it is tremendously dimmer. The lunar eclipse schedule is pretty quick and it is all over before you realize it. If you get the chance to watch lunar eclipse live, put aside at least an hour or more. Some last less than an hour and some last for three or more hours.

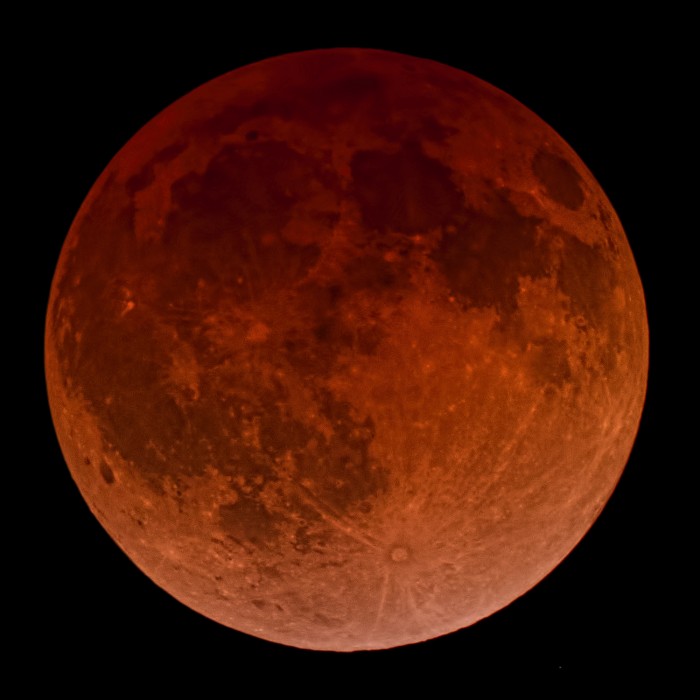
total lunar eclipse Once the eclipse is in totality it is hard to pull yourself away from looking at it long enough to check the pictures and make sure the exposure is correct. This is when you need your camera automated. You can automate higher end cameras by using a computer to control it or using a device that takes exposures on a set schedule or interval called an intervalometer. Some cameras, and even video cameras like a GoPro can take multiple exposures at a set interval without external control.

If you haven’t seen a total lunar eclipse in person you really should make it a point. The next two are October 8th of 2014 and April 4th of 2015 for a good portion of North America.

You can read more about a lunar eclipse at Wikipedia.


Share this post! Facebooktwitterredditpinterestlinkedintumblrmail
Getting Started: Budget Astrophotography released

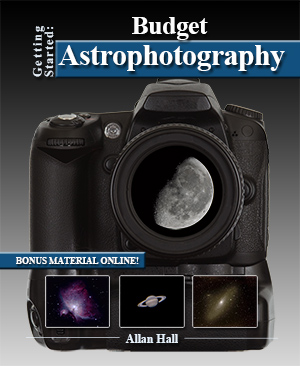
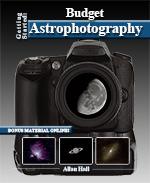
Here it is, Getting Started: Budget Astrophotography, finally! After almost a year the astrophotography book tons of people suggested I write is done and I had an absolute blast making it happen. Sure it was a lot of work, but it was also a ton of fun testing out theories and building projects. After all, if I can’t make sure it works I certainly don’t want to suggest you try it.

Getting Started: Budget Astrophotography Inside you will find a ton of information including a complete image processing walkthrough using only freely available software, tons of do it yourself projects and much more. If you are interested in astrophotography but just want to dip your toe in and not spend a fortune, this is the book to get you started. The book covers just about anything you need to know to get started, from budget telescopes, to the cheapest camera for astrophotography, DSLR astrophotography, astrophotography software and even software that will allow you to mimic  Photoshop on a budget. You can learn more about the book at https://www.allans-stuff.com/bap/ and discuss it at https://www.allans-stuff.com/forum/. Getting Started: Budget Astrophotography is available on Amazon or directly at https://amzn.to/2J7bpwL and will be available in both print and Kindle editions.

Here is the description as it appears on Amazon:

Allan Hall makes learning how to photograph the night sky easy with his new book Getting Started: Budget Astrophotography. In this guide, you will learn the fundamentals of astrophotography – what it is, how it’s done, and how to do it yourself. Getting Started: Budget Astrophotography is divided into these three sections in order to provide a comprehensive overview of the basics of astrophotography.  
 
Understanding 
The first section of Hall’s guide focuses on understanding astrophotography. Amateur and professional stargazers know that one of the most important things to consider when viewing the heavens is light pollution. Light pollution is exactly what it sounds like – too much light in our environments makes it more difficult to get a good look at planets, stars, and other celestial bodies. If you want to get the best view and photo possible, you must find a location that has little light. This makes a huge difference. In addition to finding a good location for viewing and shooting, you will learn about camera basics, including how to mount a camera and focus a lens. Beyond that, you will read about various types of telescopes and what they do.  
 
Doing 
The title of the second segment of this reference guide speaks for itself. Once you’ve learned the fundamentals of location, cameras, and telescopes, it’s time to put your knowledge to use. This section discusses how to find targets, as in how to find objects of interest to shoot. From capturing images to camera and exposure settings, you will learn how to make the most of your instruments and location by taking a great shot. This section also discusses making videos, image stacking, and image editing, an important aspect of astrophotography. Many of the celestial shots we see are time-lapse or edited in some way (to improve clarity and reduce visual “noise”). While it may sound difficult, this reference guide simplifies the processes by providing step-by-step instructions. 
 
Building 
For the handy home astrophotographer, this section includes information about do-it-yourself projects. From modifying your equipment (for example, improving your focus capabilities, modifying a webcam for astrophotography, and even adapting your laptop screen to function in the dark) to building add-ons, you’ll learn how to enhance your experience in your own home. Hall provides information about creating glass solar filters for your cameras and even making your own dew heaters.  
 
Getting Started: Budget Astrophotography is a great reference guide for beginners and amateur astrophotographers. If you have an interest in astronomy and want to capture what you’ve viewed through a telescope, doing so is possible from your own home. Hall’s comprehensive guide also provides ideas about where to start (as in, what targets are best to photograph), where to find more information about astrophotography, and even a glossary of terms. Indulge your hobby and learn how to improve with Getting Started: Budget Astrophotography.


Share this post! Facebooktwitterredditpinterestlinkedintumblrmail
ATIK 383L Mono CCD, my new camera

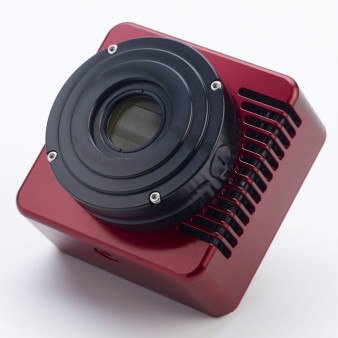
I recently purchased an ATIK 383L Mono CCD to branch out into mono imaging. I have been using my Nikon D7000 DSLR as my primary imaging camera for years but recently decided that it was time to make the step up to the big leagues and do some serious narrowband imaging. After looking around for a while I decided that the ATIK 383L Mono CCD Camera with Kodak KAF8300, 3362H x 2504V Sensor, 5.40um Pixels, USB 2.0, Thermoelectric Cooling available on amazon would make an excellent camera to start with.

ATIK 383L Mono CCD At 8 Mega Pixels it has the resolution I wanted to be able to print large, and since it is monochrome, 100% of those pixels translate into real resolution as their is no Bayer matrix like on one shot color cameras. Being able to cool it to 40C below ambient is a huge plus as well. Unfortunately the weather has not cooperated for the past six months or more so I am not sure when I will actually get to create some nice images with it but keep an eye out to see what I can do with it. Rest assured that new images are coming and that I hope to have some posted shortly. If you want one too, don’t forget you can help support this website by purchasing it with this link to the ATIK 383L Mono CCD Camera  on Amazon

Of the few shots I have made I have learned that just shooting with this thing as monochrome and not using anything but a light pollution filter creates amazing image. Sure, I like the beautiful color images you can create of celestial objects as much as the next person but the mono images this thing can take will stop you in your tracks.

I am also pleased with the size and weight of this camera. It is lighter than my DSLRs as well which is always a concern when doing astrophotography. I was amazed at how quiet it is as well considering the size of the fan.

Over all, so far I am impressed. If you get the chance to play with a ATIK 383L Mono CCD I am sure you too will enjoy it.

You can get detailed specifications on the KAF8300 sensor used in this from Kodak.


Share this post! Facebooktwitterredditpinterestlinkedintumblrmail